Simple Recording with Audacity
Purpose

- This WIKI explains how to use the Audacity application to create simple recordings.Audacity is an easy-to-use digital multi-track audio recorder and processor. This application is also available in Windows and MAC OSX due to its popularity.
- The Audacity application in the Computer Lab is considered an introductory level of audio recording. The AVIT suite will have more sophisticated equipment for high quality recordings. On the other hand, using the Audacity application in the Computer Lab can teach elements of recording to help guide volunteers into the using the AVIT suite...
- In this tutorial, we will only concentrate on recording a voice via the computer lab's webcam, and importing and some background music. The artist and performer of this song has given permission for this song to be used in these Westminster YouTube videos.
YouTube Video
- If you want to see the visual steps for "Simple Recording with Audacity",
- Here is a link to a customized YouTube video: http://www.youtube.com/watch?v=uppLRSh2RCI
Written Instructions
- Below are the instructions on how to create a simple recording (eg. commercial) using the Audacity application:
- WARNING: YOU ARE NOT PERMITTED TO USE COPYRIGHTED MATERIAL WHEN USING ANY APPLICATION IN THE WESTMINSTER COMPUTER LAB WITHOUT PERMISSION OF THE ARTIST. IT IS RECOMMENDED THAT THE MUSIC YOU CREATE BE "HOME-MADE", OR USE PUBLIC DOMAIN MUSIC.

Set-up Prior to Using Audacity (Optional)
- In this tutorial, we will keep the recording session simple:
- No recording of instruments
- Recording from a simple microphone (WebCam)
- Since there may be several input devices connected to the computer system, never assume that the recording input device is the WebCam. We need to check and if possible, change the sound settings on the computer system to select the WebCam as the audio recording device. It is recommended for this simple type of audio recording using Audacity to set the input device from computer's "Sound Preferences". Below is the procedure to select the default input device for operating system under "Sound Preferences":
- Go to the main menu and select: PREFERENCES -> SOUND
- In the "Sound Preferences" dialog box, click the Input tab, and select LifeCam Cinema Analog Mono by pointing and clicking on the radio button. Refer to diagram on the right to confirm. When finished, click the CLOSE button.
Launching Audacity
To launch the Audacity application, simply click on the Main Menu, then select SOUND & VIDEO -> AUDIO -> AUDACITY. It may take several moments for the application to properly launch.
Main Elements of the Audacity Application
- The Audacity application window has several elements or "toolbars". It is important to take some time to study and experiment with these toolbars in order to be more flexible and efficient when using the Audacity application.
- Here is a table displaying all toolbars:
Element Description Diagram Menubar Containing all operations for recording, editing and producing an auditory product. 
Transport Toolbar This toolbar contains button to control the recording and playback of an auditory product. There are buttons to stop or pause recording or playback. In addition, there are buttons to move to the beginning or end of the auditory file. 
Mixer Toolbar Containing slider controls the mixer settings on the sound card/device. 
Meter Toolbar Audio meter to display and used to help control recording and playback volume levels. 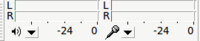
Device Toolbar Used to select the soundcard, webcam, USB devices for input and/or playback. 
Selection Toolbar Contains "indicators" to show and allow the user to select "points" and "ranges" in a numerical fashion as opposed to clicking and dragging. 
Transcription Toolbar Allows the user to adjust the speed of the auditory product (affecting the pitch).
Note: if you wish to change the speed without affecting the pitch, see the section below under the section labelled "Interesting Features".
Tools Toolbar Contains various tools for object selection, volume adjustment, object zooming, and object time-shifting. 
Recording Vocals
- By default, this application uses the computer system's default input device (which you selected earlier). To record your voice, simply click the record button in the transport toolbar, and start recording your voice. You should notice a track automatically appears as you are recording your voice. When you have completed recording, then click the stop button. It is recommended that you click the rewind button (contain in the transport toolbar) to return the pointer to beginning of the recording.
- The track that you just created has some buttons on the left-hand side of the track, which have the following functions:
- Increase / Decrease the output volume of the track during playback.
- Pan the track to the left, right, or somewhere in between the left and right.
- Delete the track (The "X" button)
- Mute the track (don't play track during playback)
- Set the track to SOLO (don't play any other tracks than SOLO track during playback)
- Change or set the track characteristics (eg. stereo, mono, etc)
If you are not pleased with recording the vocal, you can either close the track or in the menubar, click EDIT -> UNDO RECORD, and then repeat your vocal recording.
Inserting New Tracks
- The user can point and click to indicate where to begin recording subsequent tracks. This is a useful tool when dubbing-in or adding vocal or sound effects.
- When the user has set the selection point, then simply click on the record button to record the subsequent track. Each time you click on the record button, a new track will appear.
Adding Effects
- The user can add special effects can be applied to a recorded track (or a portion of the recorded track).
- One limitation of the Audacity application is that the performer cannot hear the effect while recording their vocal or playing their instrument. For this "real-time" feature, another application called Ardour is considered more advanced. The Ardour application is very similar to Protools, but requires a steeper learning curve on how to use it.
- Several common effects include:
- Amplify
- Change speed
- Change Tempo
- Equalization
- Fade in
- Fade out (song's volume fading out at the end)
- Echo
- Phaser
Editing Recorded Tracks
- One characteristic of Audacity is that it is very easy to edit tracks due to pointing on a track, then dragging the mouse to select the track. The GUI (Graphical User Interface) makes it very intuitive for the user to select, copy, cut, and paste recording segments as easily as forming similar operations with a word processor.
- Several common editing operations include:
- Select, and cut unwanted portions of a track (or combined tracks).
- Copying a segment of a track to be pasted to form a longer segment
- Selecting tracks to add special effects (via the Effect menu)
Saving Project / Exporting to Other Sound Formats
- It is highly recommended to save your audio project in the default "audacity" file format (aup). This create storage file, as well as creates a folder containing all audio data relating to that project. It is recommended to keep those files for future editing and mixing even if a final version of the song has already been created.
- In order to convert the audio project into a song (like an MP3, WAV, OGG file), then in the File menu select Export.
- In the Export File dialog box, the user enters the name of the audio file, and at the bottom selects the type of file format.
- Some of the file formats include:
- MP3
- OGG
- WAV
- WMA
- GSM
- When the user completes the Export File dialog box, and clicks OK, an Edit Metadata dialog box appears. This dialog box allows the user to enter "tags" which provide information while the song is played (for example, displaying Track Name and Artist in Windows Media Player). When the user has completed this dialog box, then click OK, and the file will be exported to the new file format, and ready to be played.
Additional Resources
Tutorials
- Basic User Guide: http://audacity.sourceforge.net/manual-1.2/


