DPS915 Toad
Contents
[hide]Project Name Goes here
Team Members
Progress
Assignment 1
PI Calculation
Explanation
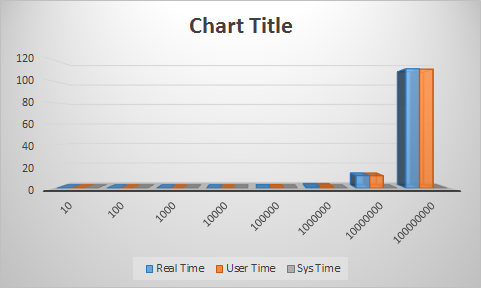
One of the profiles we decided to look at was the Monte Carlo PI Approximation method for solving the value of PI. We found that as the number of iterations increased exponentially by 10, so did our ability to get more digits for the value of PI. We believe that the scope of this program is too small to analyze as a group of 2 and are not using this as our program to solve.
Code
double xValue, yValue;
for(int i = 0; i < npoints; i++)
{
//Generate random numbers
xValue = (double) rand()/RAND_MAX;
yValue = (double) rand()/RAND_MAX;

if(sqrt((xValue*xValue)+(yValue*yValue)) <= 1)
{
circle_count++;
}
}

double pi, ds;

cout<<circle_count<<"/"<<npoints<<endl;
ds = (double)circle_count/npoints;
cout<<ds<<endl;
pi = ((4.0)*ds);

cout<<"PI = "<< pi <<endl;
"
Sample GPROF
Flat profile:

Each sample counts as 0.01 seconds.
  %   cumulative   self              self     total
 time   seconds   seconds    calls  Ts/call  Ts/call  name
100.00    122.05   122.05                             picalc(int)
  0.00    122.05     0.00        1     0.00     0.00  _GLOBAL__sub_I__Z6picalci
Bar Graph Showing Timings
Image Processing
For this assignment, I had originally intended to do image processing for .png and .jpeg files, however this turned out to be much harder than I thought. Without the necessary skills to write an image parser, I was reliant on already established libraries such as `ImageMagick` and `pnglib`. However, it became problematic to get these libraries to run on my personal machine as well as the matrix servers.
I came across some code written by Christopher Ginac (open source) located here (http://www.dreamincode.net/forums/topic/76816-image-processing-tutorial/), that I was able to use to manipulate images (create negatives, rotate, flip, etc…) and then test how long it takes to perform each action. When I first began my profiling, I quickly found out that small images simply do not require a lot of computational power to manipulate. So my solution was to take a simple 2.2 MB image, enlarge it to 110 MB, work with that image instead and then shrink it back down to the original 2.2 MB size.
This is the profile:
 %   cumulative   self              self     total
time   seconds   seconds    calls   s/call   s/call       name
34.89      3.52     3.52        5          0.70     0.70       Image::operator=(Image const&)
22.99      5.84     2.32        4          0.58     0.58       Image::Image(int, int, int)
14.67      7.32     1.48                                              Image::rotateImage(int, Image&)
11.10      8.44     1.12        1          1.12     1.12       Image::Image(Image const&)
10.11      9.46     1.02                                              writeImage(char*, Image&)
 2.28      9.69     0.23                                               Image::negateImage(Image&)
 1.88      9.88     0.19                                               Image::reflectImage(bool, Image&)
 1.68     10.05     0.17                                              Image::enlargeImage(int, Image&)
 0.30     10.08     0.03                                              Image::shrinkImage(int, Image&)
 0.10     10.09     0.01                                              readImage(char*, Image&)
 0.00     10.09     0.00        5          0.00     0.00       Image::~Image()
 0.00     10.09     0.00        1          0.00     0.00       _GLOBAL__sub_I__ZN5ImageC2Ev
As you can see, an image rotation by 180 degrees took approximately 14.67 percent of the computational time. Although it only took 1.48 seconds, that’s still seems to be quite a long time.
Consider this: video games render on my home machine between 80 and 120 frames per second. Each frame has a resolution of 1920x1080, which by simple high definition standards, would result in an image size of around 3.5 MB’s. If we multiply that by 100, we can 350 MB’s of data and then when we consider that more that just rotations are occurring, we quickly find that parallel programming is the only solution to parsing so much data at that required rate. Although the CPU has low latency and low throughput, the GPU with its high latency and high throughput should be able to give us a hand here.
When I opened up the code to look at the logic responsible for the rotation of the image, I found two double for loops, one after the other (total of 4 ‘for’ loops). It is then logical to take each computation performed on this matrix (which is a 2D array of ints) and write a CUDA kernel task to run parallel in order to reduce rendering time.
My plan is to parse the image many times (in a loop), in order to ‘simulate’ a game rendering - so that I can significantly increase the amount of data being passed to the processor. Therefore, we should be able to see a clear difference between the native C++ code written to execute on a CPU, versus the CUDA code written to run on the Nvidia GPU.
Assignment 2
We decided to parallelize the Image processor written by Christopher Ginac. It is a serial C++ program that supports many functions, such as: negation, rotation, translation, flipping and more. An image processor is perfect to apply a parallel solution to, as it naturally contains a matrix of data. So let's get started!
Road Block Number 1
The first problem we had was with the C++ program itself. Paying respect to the mighty C++, the author of the original code used a class based implementation to store the data members and methods for his image processor. Normally, this would be great! However, with our Cuda implementation, it caused a rather difficult problem. We could not access the private data members within the kernel. Thinking on this problem for a little while, we came up with a rather simple solution! We would copy the data into temporary variable, which we would then pass to the device. This would have worked wonderfully, if we didn't hit road block number 2.
Road Block Number 2
The author stored the pixels in a 2 dimensional array (int ** pixelVal[rows][cols]). In terms of a serial program and in regards to how an image is represented, this makes perfect sense. However, copying that array to the device was a difficult problem that we did not know how to solve. Luckily, we realized that we could serialize this 2D array into a 1D array in Row Major format. Then, our kernel could receive it as it does any other array and all our problems would be solved! Success!
Solution
Once we got passed Road Block Number 2, we realized that we wouldn't try to parallelize functions that required row or column manipulation. Therefore, we decided to parallelize 'negation' - that is, inverting each pixels colour. Although serializing the data before and after the kernel call adds two more double loops to the code, we are only interested in the negation portion. The rest, we can optimize in Assignment 3. So, we time-stamped before the kernel call and subtracted that time from the current time after the call finishes to get the 'parallel' time. This would be exactly analogous to the serial program, as it only had one loop. Let's get started!
The code:
__global__ void cuda_negate_image(int * new_array, int * old_array, int rows, int cols){

	int tIdx = threadIdx.x;
    int i = blockDim.x * blockIdx.x + threadIdx.x;
	int n = rows * cols;

   if (i < n)
        new_array[i] = -(old_array[i]) + 255;

}


void Image::negateImage(Image& oldImage)
/*negates image*/
{
    int rows, cols, gray;
    rows = N;
    cols = M;
    gray = Q;

	//convert 2D array to 1D array

	int * h_old_array = new int[N*M];
	int * d_old_array;
	int * d_new_array;
	int k = 0;

	//copy array to 1D array (Row Major)
	for(int i = 0; i < N; i++){
		for(int j = 0; j < M; j++){
			h_old_array[k] = oldImage.pixelVal[i][j];
			k++;
		}
	}

	int nblks = (N*M + ntpb - 1) / ntpb;

	cudaMalloc((void**)&d_old_array, rows * cols* sizeof(int));
	cudaMalloc((void**)&d_new_array, rows * cols* sizeof(int));

	cudaMemcpy(d_old_array, h_old_array, rows * cols* sizeof(int), cudaMemcpyHostToDevice);

	int start_s=clock();
	for(int i = 0; i < 1000; i++){
		cuda_negate_image<<<nblks, ntpb>>>(d_new_array, d_old_array, rows, cols);
	}

	int stop_s=clock();
	cout << "time: " << (stop_s-start_s)/double(CLOCKS_PER_SEC)*1000 << endl;

	int * result = new int[N*M];
	cudaMemcpy(result, d_new_array, rows * cols *sizeof(int), cudaMemcpyDeviceToHost);

	k = 0;
	//copy array from 1D to 2D array
	for(int i = 0; i < N; i++){
		for(int j = 0; j < M; j++){
			pixelVal[i][j] = result[k];
			k++;
		}
	}

	//free the Cuda memory
	cudaFree(d_old_array);
	cudaFree(d_new_array);

}
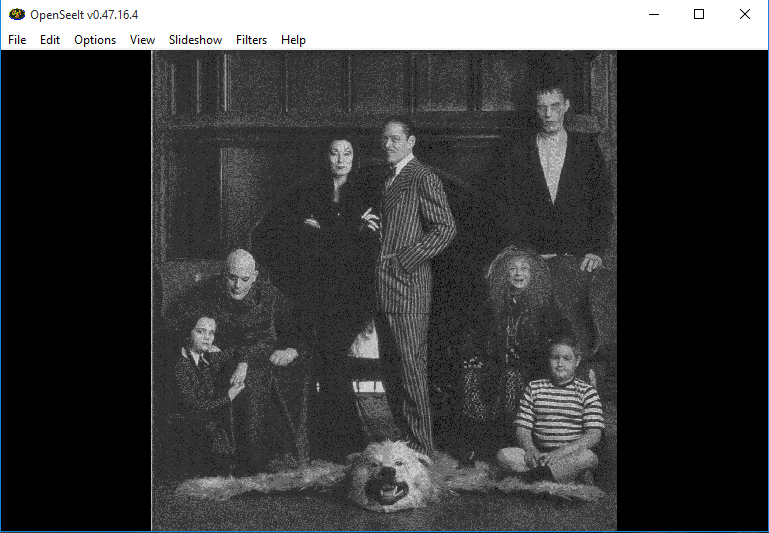
The original image:
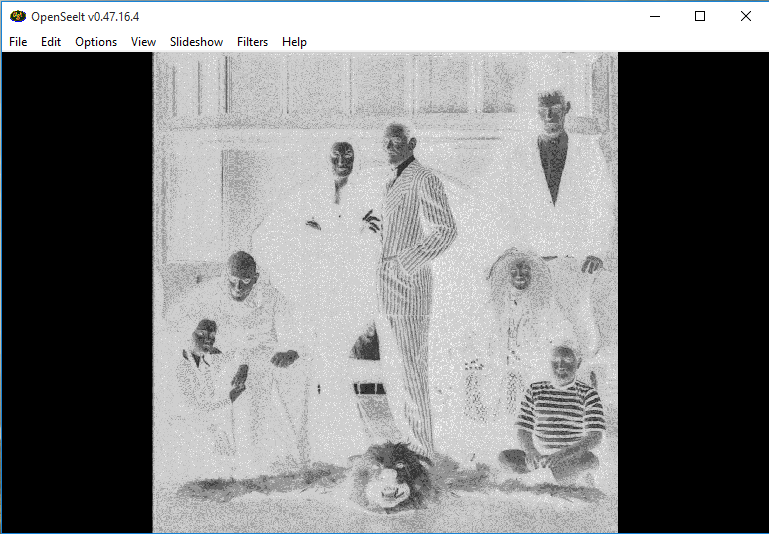
After the negation:
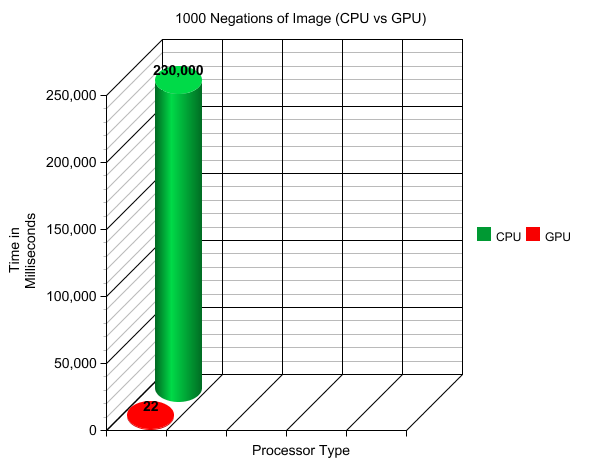
As you can see from Assignment 1, it took the serial program 230 milliseconds to negate this image of equal size. Now, seeing as this is mighty GTX 960, we thought we would not iterate through the process once, but 1000 times! That would mean that the serial implementation would take approximately 230 seconds to complete. So how fast did the GPU do it in?
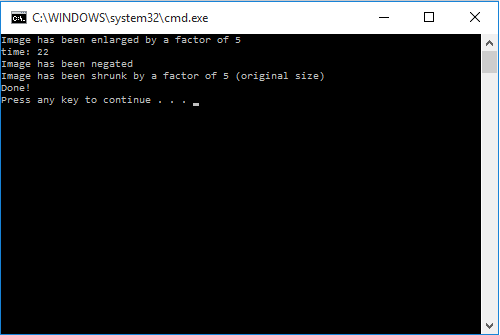
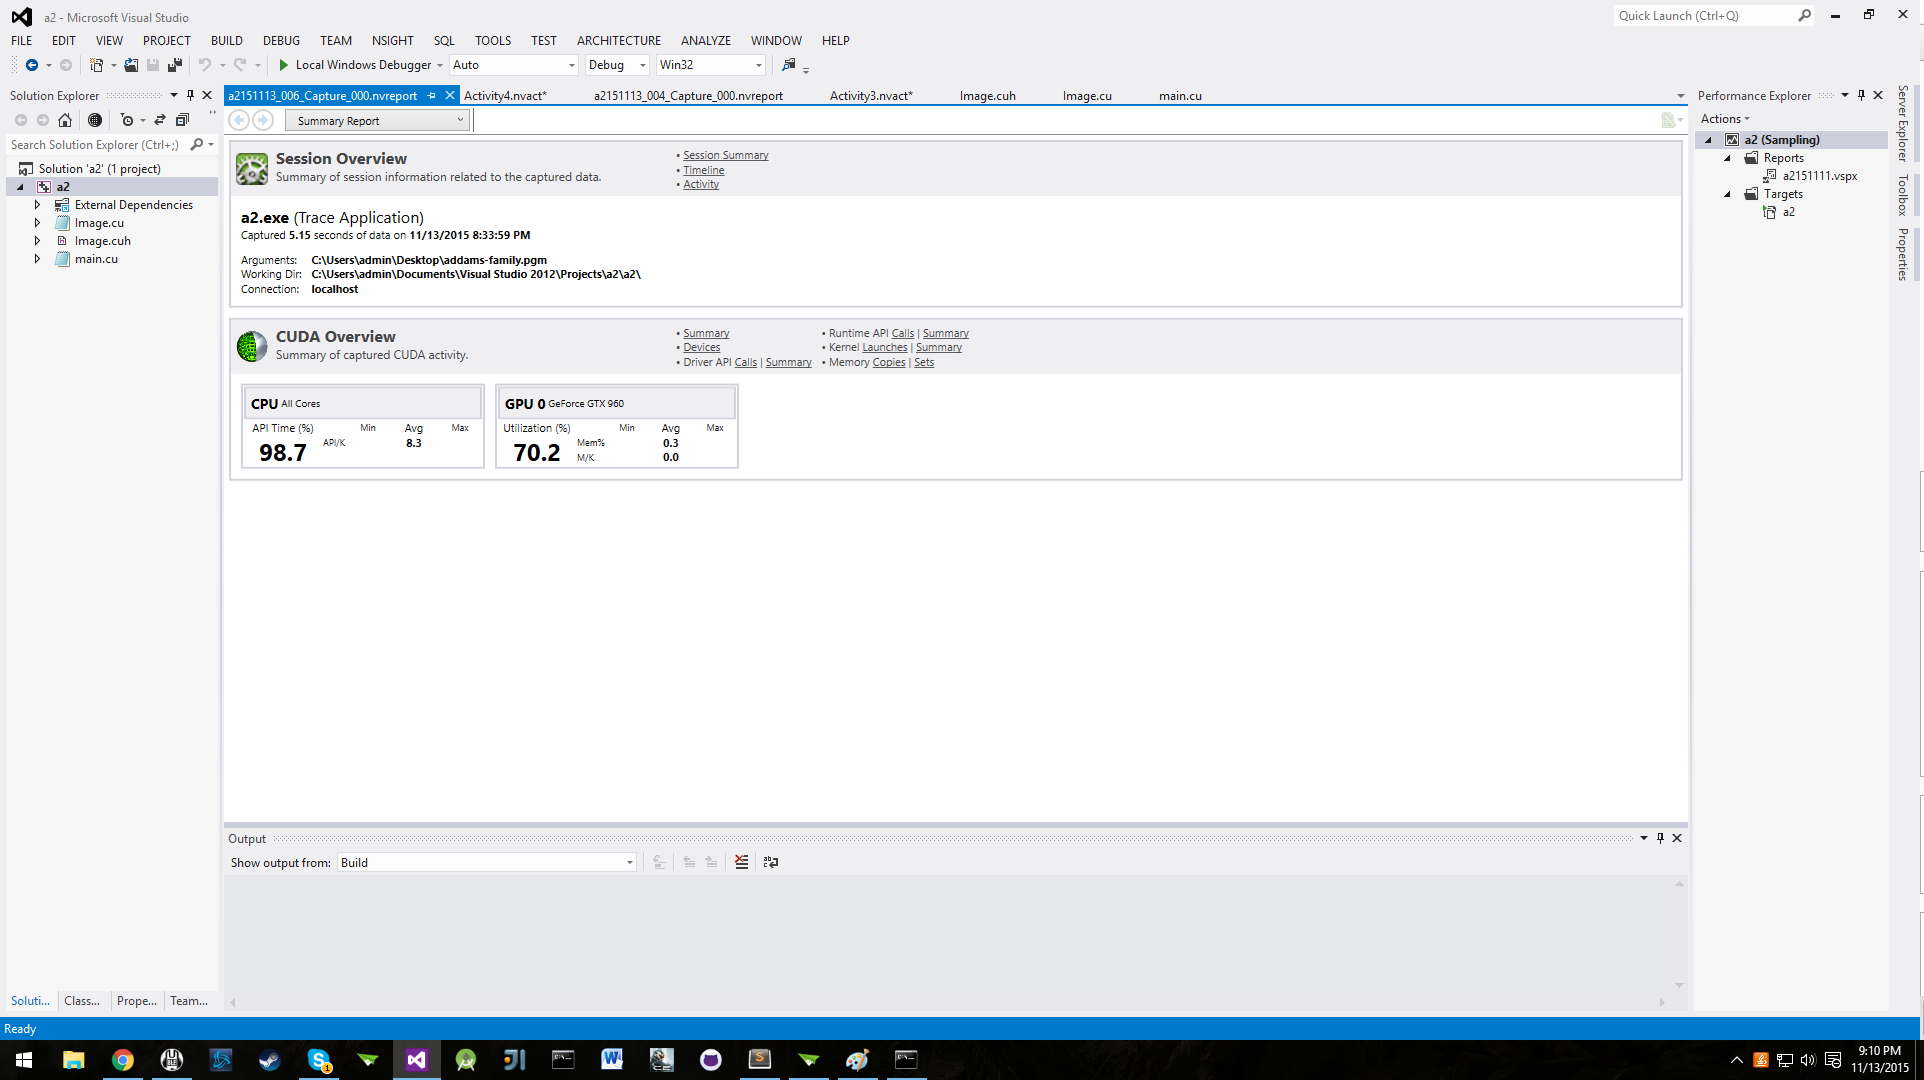
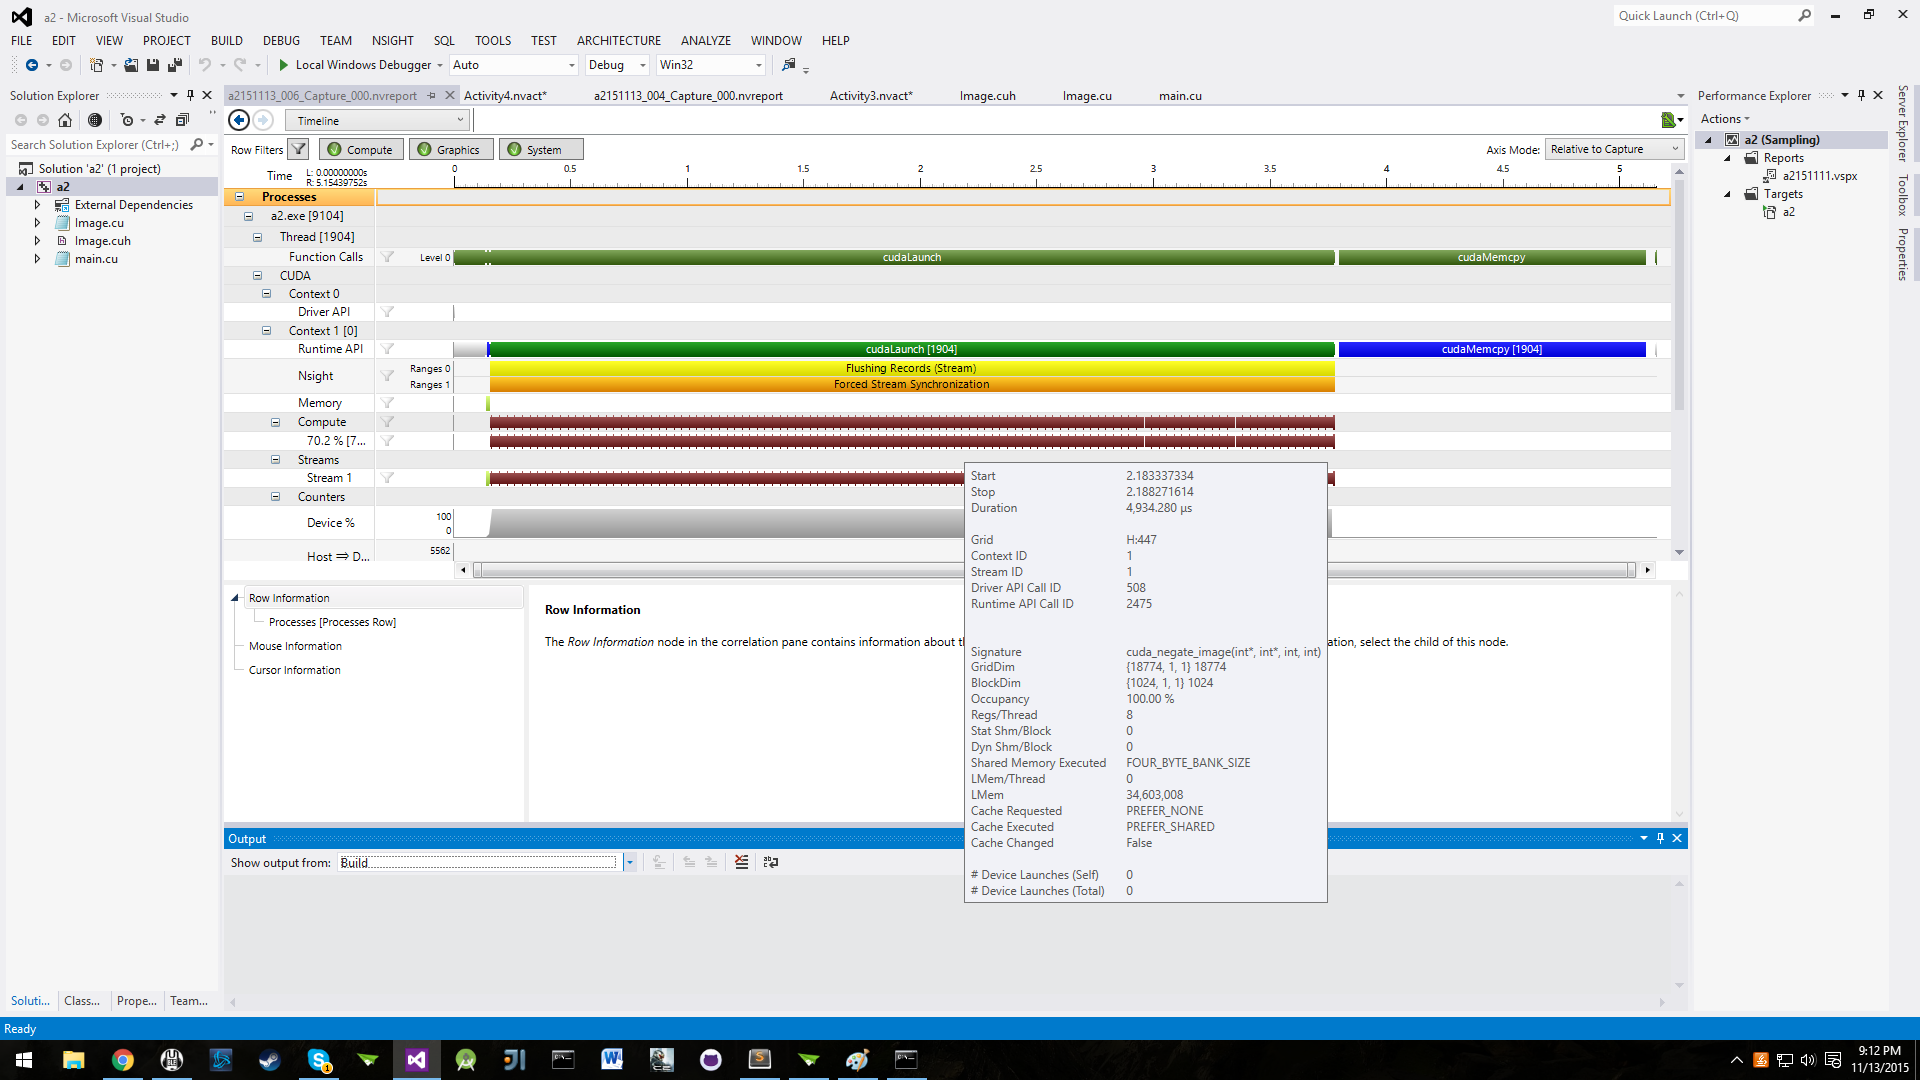
We saw the GPU smash 1000 iterations in 22 milliseconds. That's over 10,000 times faster! Clearly, image processing begs to be worked on by parallel processors. The massive throughput of the 1024 cuda cores, which can operate on thousands of pixels at the same time reduces the time, really beating the CPU without much of a sweat. Here is the NSIGHT performance analysis:
In closing, we're interested in optimizing our image processor to handle 2D arrays without serialization. That way, we can extent our GPU power to the rest of the methods, without worrying about columns and rows within a 1D array. All in all, we learned a lot and look forward to applying our knowledge further in the coming weeks!
Source of Serial Program:
http://www.dreamincode.net/forums/topic/174119-image-processing-tutorial/
Assignment 3
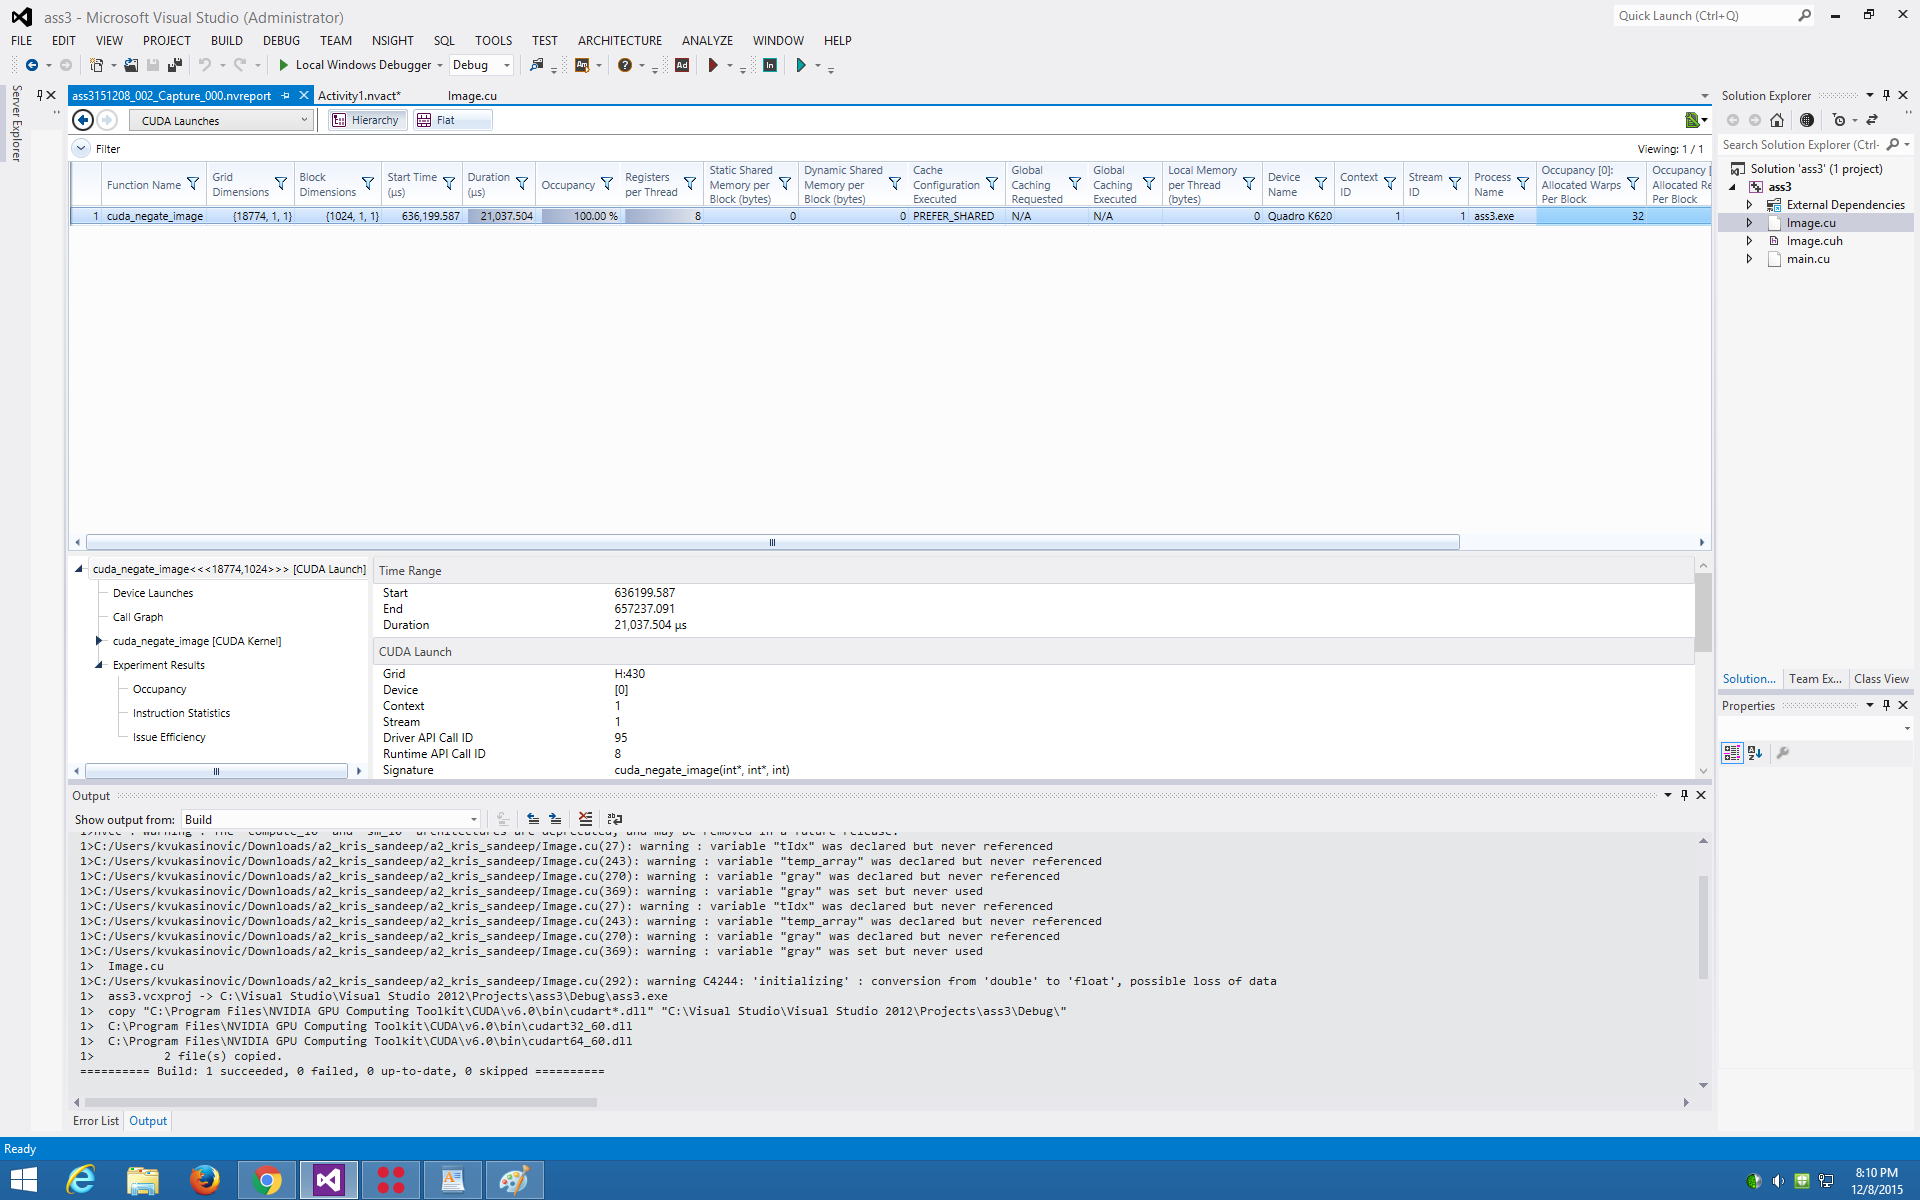
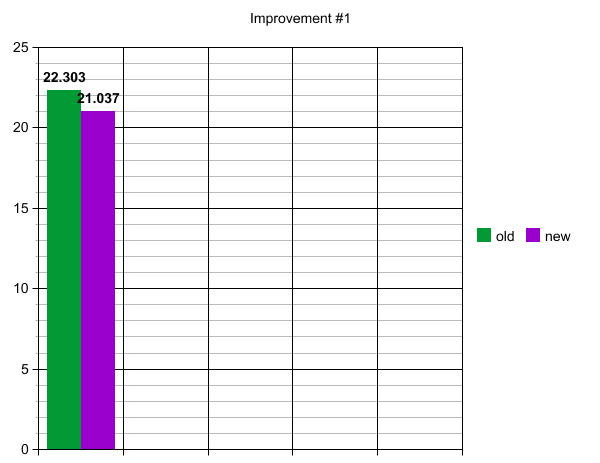
The first optimization was did was to precompute the product of rows * cols outside of the kernel itself. That makes sense for our code, because we're effectively running through 1000 image files of size, 18mb. That way, we pull some strain off the GPU.
When we ran that, we got improved the performance from 22 milliseconds to 21 milliseconds. It sounds small, but spanned over the course of many more images being processes, it's quite the increase.
We tried to use shared memory, however our array size was simply too large.
In the end, after countless and tiring changes to the code, we settled on this simple configuration as being the fastest for our purpose of negating 1000 images.
Kernel:
__global__ void cuda_negate_image(int * new_array, int * old_array, int n){


    int tIdx = threadIdx.x;
    int i = blockDim.x * blockIdx.x + threadIdx.x;

    if (i < n)
        new_array[i] = -(old_array[i]) + 255;

}
Method:
void Image::negateImage(Image& oldImage)
/*negates image*/
{
    int rows, cols, gray;
    rows = N;
    cols = M;
    gray = Q;

	//convert 2D array to 1D array

	int * h_old_array = new int[N*M];
	int * d_old_array;
	int * d_new_array;
	int k = 0;

	cout << rows * cols << endl;

	//copy array to 1D array (Row Major)
	for(int i = 0; i < N; i++){
		for(int j = 0; j < M; j++){
			h_old_array[k] = oldImage.pixelVal[i][j];
			k++;
		}
	}

	int nblks = (N*M + ntpb - 1) / ntpb;

	cout << rows * cols;

	cudaMalloc((void**)&d_old_array, rows * cols* sizeof(int));
	cudaMalloc((void**)&d_new_array, rows * cols* sizeof(int));

    cudaMemcpy(d_old_array, h_old_array, rows * cols* sizeof(int), cudaMemcpyHostToDevice);
	int n = rows * cols;
	int start_s=clock();
	for(int i = 0; i < 1000; i++){
		cuda_negate_image<<<nblks, ntpb>>>(d_new_array, d_old_array, n);
	}

	int stop_s=clock();
	cout << "time: " << (stop_s-start_s)/double(CLOCKS_PER_SEC)*1000 << endl;

	int * result = new int[N*M];
	cudaMemcpy(result, d_new_array, rows * cols *sizeof(int), cudaMemcpyDeviceToHost);

	k = 0;
	//copy array from 1D to 2D array
	for(int i = 0; i < N; i++){
		for(int j = 0; j < M; j++){
			pixelVal[i][j] = result[k];
			k++;
		}
	}

	cudaFree(d_old_array);
	cudaFree(d_new_array);

}
As you can see, some clear optimization paths in the method are the two, double for loops that convert the 2D array into a 1D array (and back again). Unfortunately, we couldn't get the CUDA kernel to handle very large 2D arrays in the way we wanted. We tried very hard to do this, but simply could not :(
