Tutorial7: Installing Linux / Live Linux / Virtualization
Contents
INSTALLING LINUX / LIVE LINUX / VIRTUALIZATION
Main Objectives of this Practice Tutorial
- Download and install the VirtualBox VM software application
- Download and install Knoppix Live in a virtual machine (via VirtualBox)
Tutorial Reference Material
| Course Notes |
Concepts |
YouTube Videos | ||
| Course Notes: | Installing Linux | Knoppix Resources | Instructional Videos: | |
KEY CONCEPTS
Installing Linux
Having a Linux system on your home computer provides access to a large selection of open source software.
Installing your own version of Linux on your notebook or desktop computer also can make it easier to practice working
in the Linux environment and learn how to perform routine Linux OS administration tasks.
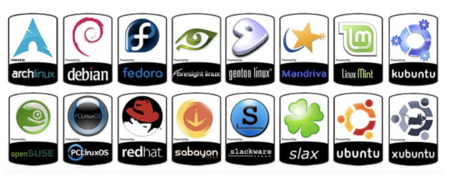
A Linux distribution (often abbreviated as distro) is an operating system made from a software collection that is based upon the Linux kernel and, often, a package management system. Linux users usually obtain their operating system by downloading one of the Linux distributions, which are available for a wide variety of systems ranging from embedded devices (for example, OpenWrt) and personal computers (for example, Linux Mint) to powerful supercomputers (for example, Rocks Cluster Distribution).
Reference: https://en.wikipedia.org/wiki/Linux_distribution
Steps in the Linux Installation Process:
- Select a Linux Distribution and download a Linux Distribution Install ISO file
to your Computer (Note: Be aware of any required Hardware Requirements for the Linux OS prior to installation.) - Burn an Linux Distribution CD/DVD, or USB, or use downloaded file when creating a virtual machine.
- Once booted, the installation process transfers the live image to a disk (or flash memory) and configures the system.
- For most distributions, the installation involves a guided graphical environment help assist with the Linux installation process.
Linux Installation Methods
Standalone Installation
- Linux is the only OS on the computer
- Any existing data on your hard disk will be erased
(Image licensed under cc)
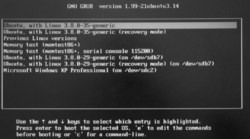
Dual-boot / Multi-boot Installation
- A boot menu allows the user to select the desired OS.
- This options provides a method to access your computer if one OS fails to boot-up.
- Most Linux distributions can access the Windows partition if your Windows OS cannot boot-up.
- This booting method is great for troubleshooting (for example: booting into other OS to confirm that you can connect to the Internet to rule-out hardware issues.
- It is recommended to back up important data before proceeding.
- It is recommended to install the Linux OS last, as other operating systems may not offer a multi-boot option.
Virtualized Installation
- Virtualization requires a compatible processor: not all processors support that feature.
- Most recent multi-core processors support virtualization.
- The virtualized OS is installed and run in a window under another OS.
- The installation can usually be accomplished from an ISO image.
- One or more virtual machines can be run at the same time.
- The guest OS shares hardware with the host OS and possibly other virtualized systems.
- Special software is used to manage the entire process, referred to as the hypervisor.
- The guest systems have network access through the host.
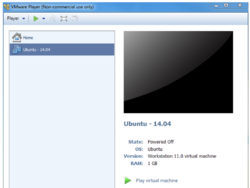
- The selection of virtualization software (which allows creation and running of virtual machines) depends mainly on the host OS, although some are cross-platform. Other considerations as to virtualization software may be features, support, price and/or personal preferences.
Popular VM software for Windows and MAC include:
- VMware
- Oracle Virtual Box
- KVM
- XEN
Live Linux CD
A live CD (also live DVD, live disc, or live operating system) is a complete bootable computer installation including operating system which runs directly from a CD-ROM or similar storage device into a computer's memory, rather than loading from a hard disk drive. A Live CD allows users to run an operating system for any purpose without installing it or making any changes to the computer's configuration. Live CDs can run on a computer without secondary storage, such as a hard disk drive, or with a corrupted hard disk drive or file system, allowing data recovery.
As CD and DVD drives have been steadily phased-out, live CDs have become less popular, being replaced by live USBs, which are equivalent systems written onto USB flash drives, which have the added benefit of having write-able storage. The functionality of a live CD is also available with a bootable live USB flash drive, or an external hard disk drive connected by USB.
Reference: https://en.wikipedia.org/wiki/Live_CD
The Knoppix Live CD is available to run on workstations at Seneca College via AppsAnywhere
or you can download and run it on your home computer as a Virtual Machine
(requires VirtualBox VM software installed on your computer).
INVESTIGATION 1: BOOTING KNOPPIX (LIVE LINUX) VIA VIRTUALBOX
In this section, you will first download and install the VirtualBox VM application on your home computer,
then you will then download the Knoppix Live Distribution VM file on your computer.
You will launch the VirtualBox application and add the Knoppix Live Linux as a new VM in the VirtualBox application.
Once you launch the Knoppix Linux distribution, you will learn to perform a few basic operations
in the Knoppix Linux graphical environment.
Perform the Following Steps:
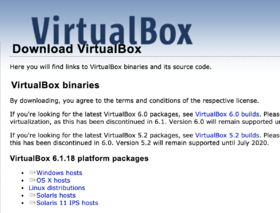
- Click the following link to access the Oracle Virtualbox application download website:
https://www.virtualbox.org/wiki/Downloads https://www.virtualbox.org/wiki/Downloads] - In this website, click the link corresponding to your computer's operating system
to download to your computer. - Install the downloaded Virtualbox VM application on your computer.
- Click the following link to download the zipped (compressed) Knoppix Live Distribution
file to your computer: Knoppix Virtualbox VM
NOTE: This file is approximately 5GB in size and might take a while to download. - Open a File Manager application and navigate to directory that the Knoppix.zip file
was downloaded (eg. Downloads). - Unzip the downloaded zip file (In MS Windows: Right click and Select "Extract All" )
NOTE: The contents of this zipped file should appear in another file manager window. - Double-click the file called Knoppix.vbox to launch
the Knoppix VM.
NOTE: By double-clicking on this file (even if the VirtualBox application is not running)
it will launch the VirtualBox application and launch the Knoppix virtual machine.
If you have difficulty running Knoppix on your home machine/laptop you may ask your
Learning Centre ULG leaders for additional help in troubleshooting why Knoppix is not working
on your home machine/laptop. - Please be patient and allow time for the Knoppix Linux distribution to start. This is a
graphical Linux distribution which will start-up in a desktop environment.
NOTE: You are NOT prompted for a username and password because this is
a Linux Live distribution and you have been assigned a generic account.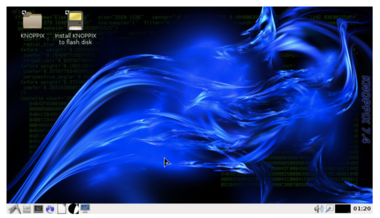 The Knoppix Linux desktop environment has a similar look as the MS Windows desktop environment.
(Image licensed undercc) - On the bottom left-hand side, click on the Knoppix start menu
(similar to the Windows start menu). - In the start menu, select System Tools
- In the system tools menu, scroll down and select to launch the terminal application called xterm
- In the bash shell, issue the following Linux command: whoami
What is the name of your generic Knoppix Linux Live account?
We will try to connect to your Matrix account, but FIRST, we need to perform a couple of steps to first connect to the Seneca Global Portal. - Issue the following Linux command to download a Bash Shell script to connect to Seneca Global Portal:
wget itas.senecacollege.ca/~mark.fernandes/vpn - Issue the following Linux command to add execute permissions to be able to run this script:
chmod +x vpn - Issue the following Linux command to the /usr/bin directory so this script works like a command:
- Issue the following to connect to the Seneca Global Portal:
sudo mv vpn /usr/bin - Issue the following to connect to the Seneca Global Portal: vpn -c
You should be connected to the Seneca Global Portal. Let's test this out by using the ssh command to connect to your Matrix account. - We need the vpn -c command to keep running in this terminal, so open another xterm terminal .
- Issue the following Linux command
to connect to your Matrix account:
ssh yourSenecaId@matrix.senecacollege.ca - When prompted, enter your password (remember that password does not "echo=back").
Were you able to connect to your Matrix account? - After logging in to your Matrix account, issue the following command to terminate your Matrix session: exit
- Confirm that you are in your home directory.
- Use a text editor to create a file in your current directory called data.txt and enter the following text displayed below:
This is line 1
This is line 2
This is line 3 - Save editing changes and exit the text editor.
- Confirm that you created this file and confirm that the contents of this file are correct.
- Logout of your Matrix account.
- Close your xterm application.
- Switch to the Bash shell where the command vpn -c is running. Press ctrl-c to stop this program from running.
- Close the xterm window.
- Use the Knoppix start menu to launch a web-browser and go to the Google website.
- Use the Knoppix start menu to select Office and then select LibreOffice - Writer to launch a word processor application.
- Create a small document and save changes to your home directory using your first name, and exit the Libreoffice word processing document.
- Use the Knoppix start menu to select logout, then select shutdown to terminate your Knoppix Linux Live session.
- Repeat the steps to launch a new Knoppix Linux Live session.
- Use the Knoppix start menu to launch a graphical file manager.
- In the file manager, search for your word processing document file that you saved on your home directory. Is there document there. If not, why?
- Use the Knoppix start menu to shutdown your Knoppix Linux Live session.
- Work on the Linux practice questions located at the bottom of this tutorial.
LINUX PRACTICE QUESTIONS
The purpose of this section is to obtain extra practice to help with quizzes, your midterm, and your final exam.
Here is a link to the MS Word Document of ALL of the questions displayed below but with extra room to answer on the document to simulate a quiz:
https://ict.senecacollege.ca/~murray.saul/uli101/uli101_week7_practice.docx
Your instructor may take-up these questions during class. It is up to the student to attend classes in order to obtain the answers to the following questions. Your instructor will NOT provide these answers in any other form (eg. e-mail, etc).
Review Questions:
- Define the term Linux Distribution.
- List and explain two advantages of installing a Linux distribution on your home computer or laptop.
- List and explain two things to consider prior to installing a Linux distribution on your home computer.
- Explain why installing Multi-boot for Linux is useful for computer troubleshooting.
- Define the term Virtualization.
- List the steps to boot the Knoppix Linux distribution from a Workstation at Seneca College.
- List the steps to boot the Knoppix Linux distribution from a CD or USB from your home computer.
- List the home pages of the Linux distributions shown in the Linux distribution image above.
