Importing Pictures From a Digital Camera
Purpose
- This WIKI explains how to import pictures into the computer system for graphical editing, slide-show presentations, etc...
- This tutorial will use a particular digital camera, but the procedures for other digital cameras will general be the same...
YouTube Video
- If you want to see the visual steps for "Importing Pictures From a Digital Camera",
- Here is a link to a customized YouTube video:
Written Instructions
- Below are the instructions on how to Import Pictures From a Digital Camera:
Importing Pictures
Prior Assumptions
- The camera used for this tutorial was:
- Sony Cyber-Shot P39A
- 5.1 MegaPixel
- MPEG MOVIE VX, Smart Zoom
Creating a Storage Folder
- Prior to importing pictures or video into the computer, it is recommended to create a folder to store the imported images.
- Folder set-up Strategies:
- Create a folder on your USB device for off-site storage.
- Create a folder within the Pictures folder for your account (if number of pictures/video exceed USB storage device capacity).
Connecting the Digital Camera to Computer
- The digital camera bag should contain a USB cable that is used to connect the camera device to a computer.
- Connection Procedure:
- Use the USB cable to connect the camera to the Computer by plugging into a USB slot.
- Select the mode of the camera to "display pictures" (i.e. not camera mode).
- Power-on the camera.
Opening the Camera Device
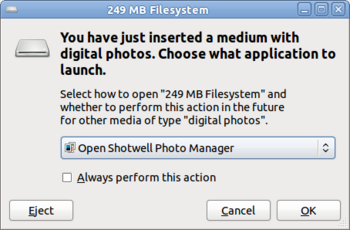
- When the camera is powered-on, then a device dialog box should appear that gives the user options on how to proceed with using this device.
- For Example:
- Open device and run application to automatically import pictures and videos
- Run another application to import and use pictures and videos
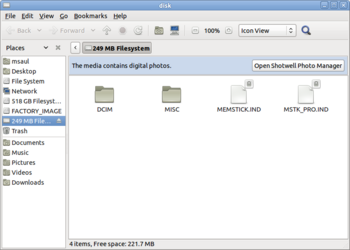
- Open Folder to display pictures and videos
- Do nothing (i.e. take no action)
- NOTE: Due to storage limitations in the Computer Lab, it is advised to select "open folder" to copy pictures and videos to an "off-site" storage device for permanent storage.
- Although applications like Open Shotwell are great tools to managing pictures and videos on your home computer, the Computer Lab does not have the storage capacity to permanently store images and videos on its hard disk drive. Therefore, it becomes the responsibility of the user to store these pictures onto off-site storage devices, and remove pictures and videos from the computer system's hard-disk drive after importing and graphic editing sessions.
Transferring Pictures
- In this case, we will interpret importing pictures and videos in this tutorial as copying pictures and videos to the folder that you created in the above-mentioned procedure. The disadvantage of using this technique is that the user will be required to manually deleted the pictures and videos on their digit camera now, or at a later date. See "Removal of Copied Pictures / Videos".
- To copy these pictures, simple open another instance of Nautilus file manager, and use the mouse to click and drag the images to the new folder.
- Here is a YouTube video on how to use the Nautilus file manager: http://www.youtube.com/watch?v=_DsoidBjbjY
Transferring Videos
- Some digital cameras store their videos under a different folder. Simply navigate throughout the folder structure of the digital camera to locate the videos.
- To copy these videos, simple open another instance of Nautilus file manager, and use the mouse to click and drag the images to the new folder.
- Here is a YouTube video on how to use the Nautilus file manager: http://www.youtube.com/watch?v=_DsoidBjbjY
Off-Site Storage Considerations
- To be completed ...
Removal of Copied Pictures / Videos
- To be completed ...
Additional Resources
- To be completed ...


