Download and Burn in TEL Open Lab
| Please be aware of these facts when using the CD/DVD burners at Seneca's computer labs:
|
Before Proceeding with Download and Burning:
Procedure to Download and Burn a CD/DVD in TEL Open Lab:
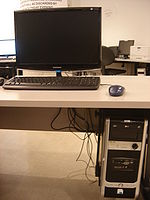
- Set "Master Selector" on CPU to Internal.
- Power on Computer.
- Place CD/DVD media into the writable CD/DVD drive.
- To access the boot menu quicker, press ESC at the network boot procedure
- Select 2. Win 7 from the boot menu
NOTE: It may be preferable to boot WINDOWS as opposed to Matrix
(since you may have limited account space in your Matrix account to download a DVD image). - Determine which image you want to download. Below are links to both the Fedora19 LIVE CD and Fedora19 DVD installation images:
Fedora19 LIVE CD: http://belmont.senecac.on.ca/fedora/releases/19/Live/x86_64/Fedora-19-x86_64-Live-Desktop.iso
Fedora19 DVD Install: http://belmont.senecac.on.ca/fedora/releases/19/Fedora/x86_64/iso/Fedora-19-x86_64-DVD.iso
- Right-click on the appropriate link (displayed above), and select "Save Link As" in the context menu, and select "Desktop" as the location, then click SAVE.
The downloading procedure will be VERY fast (only a few minutes). You can tell if the file is currently downloading if you see two files: One the image file, and another file with the same name, but the additional title (PART). Once the "Partial" file no longer appears on your desktop, then the file has finished downloading - After the image has been downloaded to your desktop, right-click on the image file, and in the context menu, select Open With, and then select Nero Express Essentials in the sub-menu.
- Click Burn to start the burning process to the CD/DVD. This process will take several minutes.
- When the burn is completed, exit the application, and remove your CD/DVD from the machine.
- Remove your downloaded images on your desktop.
- Log-out and shutdown the computer.
- It is highly recommended to test to see if your install CD/DVD image works by going to your OPS235 lab, and see if the CD and DVD media correctly boots up in the computer lab...

