Teams Winter 2011/team1/RCP/Define and use commands
Contents
Define and Use Commands
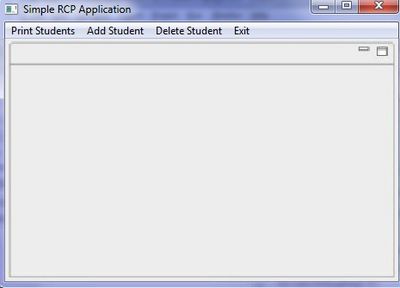
In order to be able to take advantages of user invoked operations and menus in the RCP application we create Commands and add them to menus. For this purpose we will demonstrate here how to create a "Print Students" command, which prints the student's info in the console and then add that command to the top bar menu. Then later, we demonstrate how to implement other commands like "Add Student", "Delete Student" and "Exit" to the top bar.
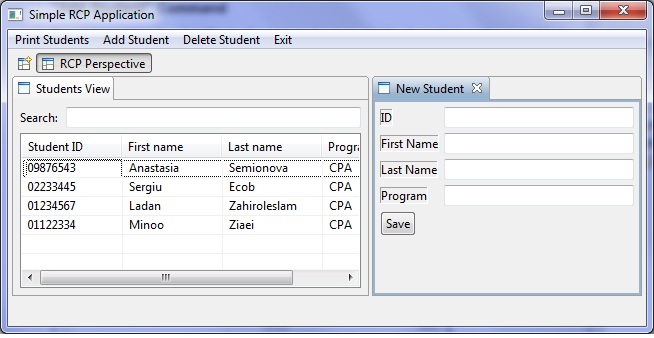
Here is what we will see after adding all the commands:
Add a Command (Print Students) to Your Project
Double click on the plugin.xml file of your project in the project explorer view, and then navigate to "Extentions" tab in the project overview window.
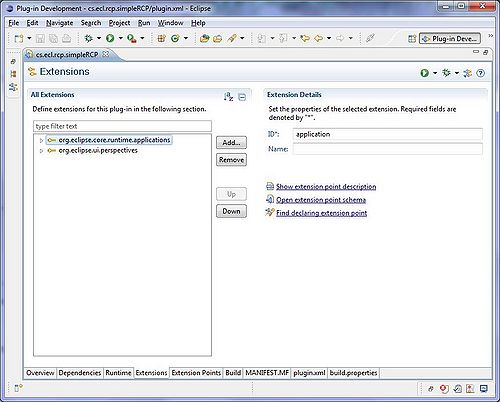
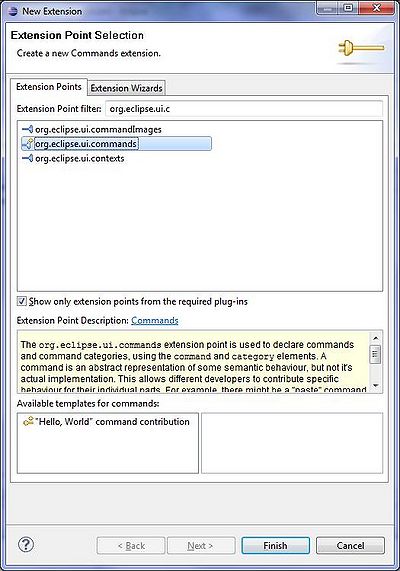
Click on "Add" button to add a new extension and add the extension point "org.eclipse.ui.commands" (do not select any template) and click on Finish buttton.
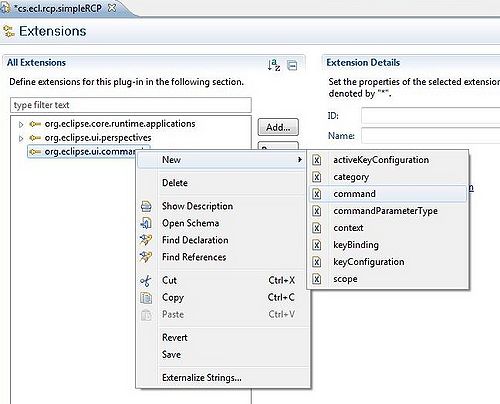
Right click on the added extention point and select command from the New menu, to add a command to your commands.
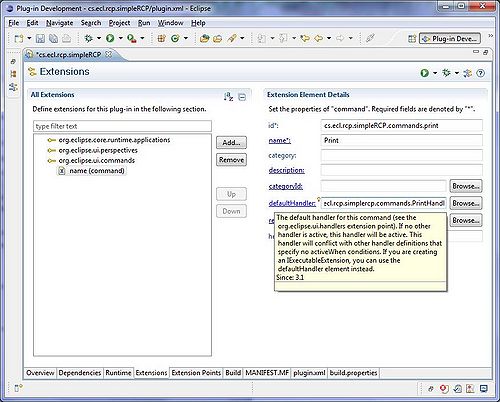
select the command and in "Extention Element Details" section, set the id of the command as "cs.rcp.simpleRCP.commands.print". Also name the command "Print", and set the "defaultHandler" class to be "cs.ecl.rcp.simpleRCP.commands.PrintHandler. Save the file (Ctrl+S).
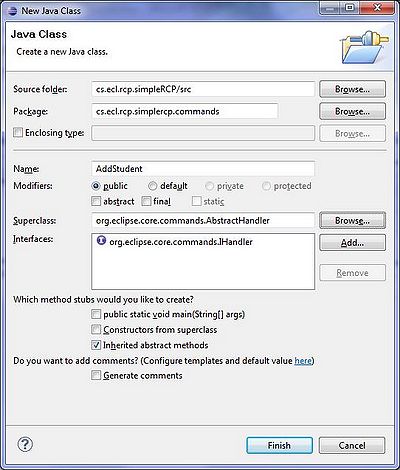
Double click on the "defaultHandler" link to create the Handler class. The New Java Class window will open with the package name and class name set in it. Make sure that the class inherits from "org.eclipse.core.commands.AbstractHandler" by setting it as the Superclass. It should also implement the interface "org.eclipse.core.commands.IHandler".
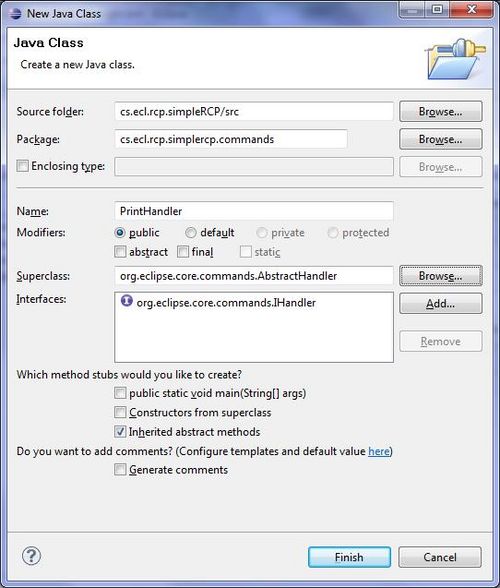
Then click on Finish button to create the class.
Implement The Command Handler
Here is the class code which is automatically generated. We have to Add our code to the "execute" method.

Modify the "execute" method with the following code:
PrintHandler.java
@Override
    public Object execute(ExecutionEvent event) throws ExecutionException {
        List<Student> studentList = ModelProvider.INSTANCE.getStudents();
        for (Student s : studentList) {
            System.out.println(s);
        }
        return null;
    }
Use The Command in The Menu
At this point we have a "Print" command but is not yet accessible to the user. In order to expose the command to the user, we have to add this command to the top bar menu. Following these steps will add the print command as a button to the top bar (we are not adding the command to a sub menu, but we are directly adding it to the top bar menu):
Add another extension point called "org.eclipse.ui.menus" in the Extensions tab of the plugin.xml screen.
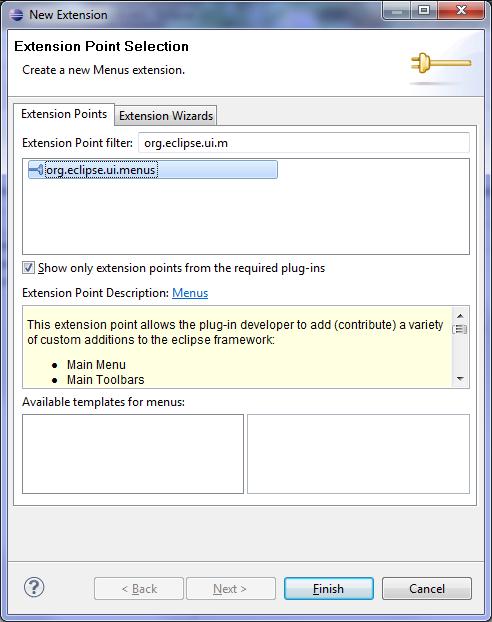
Then right click on the added extension point and choose New > menuContribution.
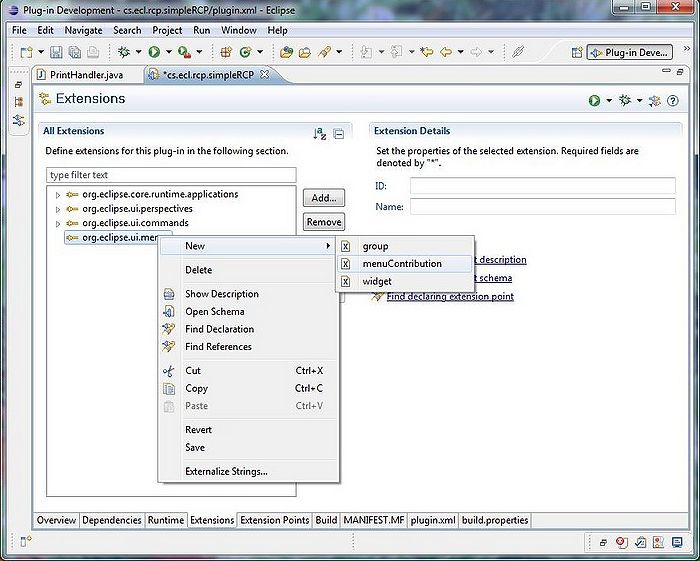
In the menuContribution's Extension Element Details section set the locationURI to :"menu:org.eclipse.ui.main.menu" (make sure it is typed correctly).
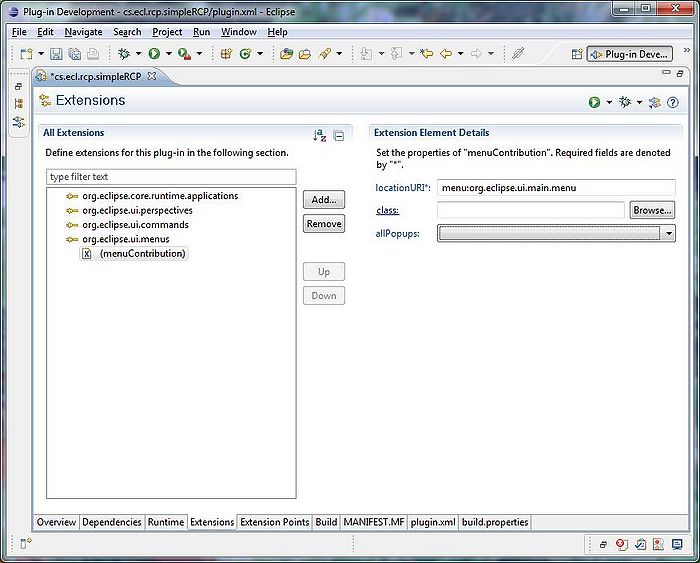
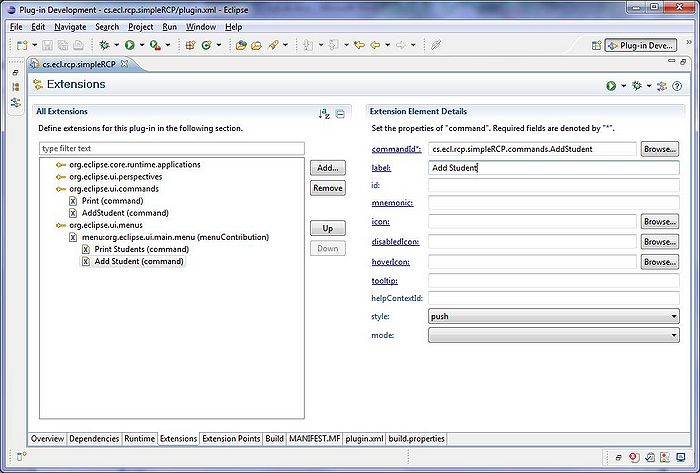
Then right click on the "menuContibution" in All Extensions section and select New > command.
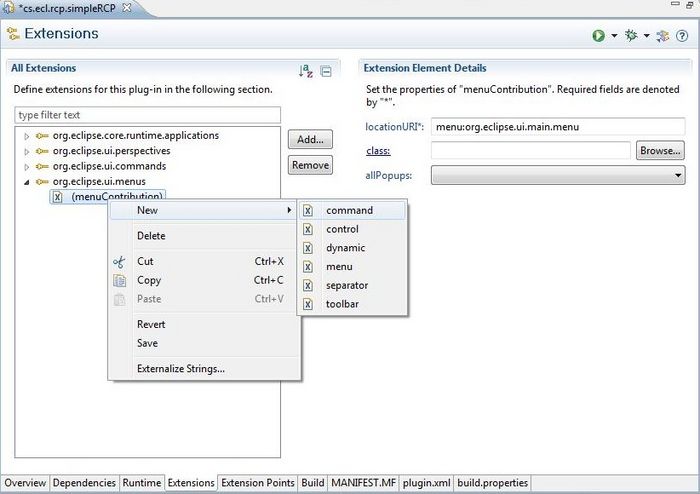
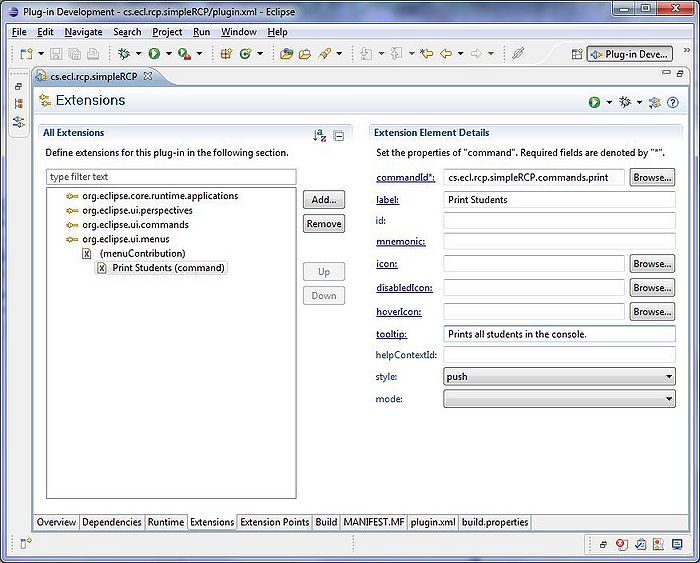
Now we will add our Print command info to the Extension Element Details of the command we just added. We can give it any lable, but the commandID must be the same as our Print Command.
Add Other Necessary Commands to The Application
Here we will add other necessary commands to our application. We add the command Handler classes the same way we added the PrintHandler class, and then will add the commands to the menuContribution Extension point. However, in order to be able to implement the command execute method, we need to wait until we add the view and the Jface tableViewer to our application. So we add the commands then leave the implementation part and come back to it after the View and editor view creation is done. So for implementation, we assume that you have gone through those parts of the tutorial.
"Add Student" Command
For implementing the "AddStudent" command, we are highly depended on the use of Editor view, so after adding the command Handler class and add the command to the menuContribution extension point, we will leave this part of tutorial and will come back to it for the implementation of the execute method in the handler class. However this will not be the only code, related to the "AddStudent" command. The reason is, we are going to modify and use the editor view to create a new student. So basically, when user clicks on the "Add Student" on the top bar, the editor view will open up and enables user to enter the information for a new student and there will be a "Save" button to save the student, Then the table viewer will show the updated data, and the editor view will close.
Here is what user can see by clicking on the "Add Student" button:
Add the "AddStudent" command to the commands extension point the same way you added the Print command, and create its Handler class.
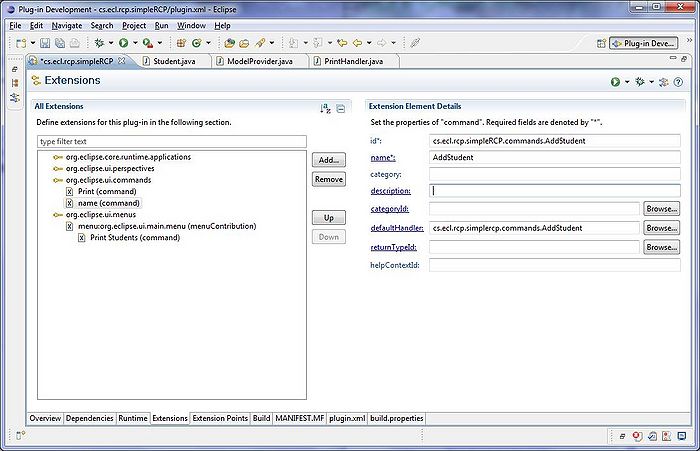
Add the command you just created to the menuContribution you have in the extension point (the same one you added Print command to).
Implementing the AddStudent command
Please do this part, after the view, Jface viewer and Editor view is added and working properly.
1. Implementing the execute method of the command handler class:
This code will get access to the page and creates an empty editor input (sending it the id of string "0" indicating that it belongs to no student), then tries to open the editor with that input id.
AddStudent.java
package cs.ecl.rcp.simplercp.commands;

import org.eclipse.core.commands.AbstractHandler;
import org.eclipse.core.commands.ExecutionEvent;
import org.eclipse.core.commands.ExecutionException;
import org.eclipse.core.commands.IHandler;
import org.eclipse.ui.IWorkbenchPage;
import org.eclipse.ui.IWorkbenchWindow;
import org.eclipse.ui.PartInitException;
import org.eclipse.ui.handlers.HandlerUtil;

import cs.ecl.rcp.simplercp.editor.MyStudentEditor;
import cs.ecl.rcp.simplercp.editor.MyStudentEditorInput;


public class AddStudent extends AbstractHandler implements IHandler {

    @Override
    public Object execute(ExecutionEvent event) throws ExecutionException {
        IWorkbenchWindow window = HandlerUtil.getActiveWorkbenchWindow(event);
        IWorkbenchPage page = window.getActivePage();

        MyStudentEditorInput input = new MyStudentEditorInput("0");
                try {
                    page.openEditor(input, MyStudentEditor.ID);

                } catch (PartInitException e) {
                    throw new RuntimeException(e);
                }

        return null;
    }

}
2. Modifying the MyStudentEditorInput class:
we will override the "equals" method to recognize if the input object to the method equals this object (EditorInput).This ensures that if you click on Add Student command several times, only one editor window will open and consequent calls to the command will only set focus on the open editor view.
MyStudentEditorInput.java
/ Added For NewStudent Command
     @Override
        public boolean equals(Object obj) {
            if (this == obj)
                return true;
            if (obj == null)
                return false;
            if (getClass() != obj.getClass())
                return false;
            MyStudentEditorInput other = (MyStudentEditorInput) obj;
            if (id != other.id)
                return false;
            return true;
        }
3. Modifying the editor view (MyStudentEditor class).
Here we do the following changes:
a) make the Text objects, a member of the class, so that they can be used in other methods.
MyStudentEditor.java
public class MyStudentEditor extends EditorPart {
    public static final String ID = "cs.ecl.rcp.simplercp.editor.studenteditor";
    private Student student;
    private MyStudentEditorInput input;

    // Added For NewStudent Command
    private Text text;
    private Text text1;
    private Text text2;
    private Text text3;
b) Modify the "init" method so it distinguishes between a new and existing student input object, and creates an empty student object for the input with id "0":
MyStudentEditor.java
public void init(IEditorSite site, IEditorInput input)
            throws PartInitException {
        if (!(input instanceof MyStudentEditorInput)) {
            throw new RuntimeException("Wrong input");
        }

        MyStudentEditorInput new_name = (MyStudentEditorInput) input;
        this.input = (MyStudentEditorInput) input;
        setSite(site);
        setInput(input);


        // Added For NewStudent Command
        if(this.input.getId()=="0"){
            student = new Student ();
            setPartName("New Student");
        }
        else
            {
            student = ModelProvider.INSTANCE.getPersonById(this.input.getId());
            setPartName("Student " + student.getLastName());
            }
        }
c)Modify the "createPartControl" method to 1)check if the student object properties are null to prevent referencing null when the student object is a new one. 2)To add a save button to the window with the listener. when clicked, the save button will set the text field inputs as the student property and adds the student to the ModelProvider class, then refreshes the tableViewer and closes the editor window. The save button only appears for the new student editor.
MyStudentEditor.java
// Modified For NewStudent Command
    @Override
    public void createPartControl(Composite parent) {
        GridLayout layout = new GridLayout();
        layout.numColumns = 2;
        parent.setLayout(layout);
        Label label = new Label(parent, SWT.BORDER);
        label.setText("ID");
        text = new Text(parent, SWT.BORDER);
        if (student.getId()!=null)
            text.setText(student.getId());
        text.setLayoutData(new GridData(SWT.FILL, SWT.BEGINNING, true, false));
        Label label1 = new Label(parent, SWT.BORDER);
        label1.setText("First Name");
        text1 = new Text(parent, SWT.BORDER);
        if (student.getFirstName()!=null)
            text1.setText(student.getFirstName());
        text1.setLayoutData(new GridData(SWT.FILL, SWT.BEGINNING, true, false));
        Label label2 = new Label(parent, SWT.BORDER);
        label2.setText("Last Name");
        text2 = new Text(parent, SWT.BORDER);
        if (student.getLastName()!=null)
            text2.setText(student.getLastName());
        text2.setLayoutData(new GridData(SWT.FILL, SWT.BEGINNING, true, false));
        Label label3 = new Label(parent, SWT.BORDER);
        label3.setText("Program");
        text3 = new Text(parent, SWT.BORDER);
        if (student.getProgram()!=null)
            text3.setText(student.getProgram());
        text3.setLayoutData(new GridData(SWT.FILL, SWT.BEGINNING, true, false));

        // Added For NewStudent Command
        Button btnSave = new Button(parent, SWT.PUSH);
        btnSave.setText("Save");
        btnSave.setVisible(false);
        if (this.input.getId()=="0") btnSave.setVisible(true);

        btnSave.addSelectionListener(new SelectionAdapter() {
            public void widgetSelected(SelectionEvent e) {
                if (text.getText().length() != 0
                        && text1.getText().length() != 0
                        && text2.getText().length() != 0
                        && text3.getText().length() != 0) {
                    student.setId(text.getText());
                    student.setFirstName(text1.getText());
                    student.setLastName(text2.getText());
                    student.setProgram(text3.getText());
                    ModelProvider students =ModelProvider.INSTANCE;
                    students.getStudents().add(student);
                   IWorkbenchWindow window =      getSite().getWorkbenchWindow();
                    IWorkbenchPage page = window.getActivePage();
                    StudentsView view = (StudentsView) page.findView(StudentsView.ID);
                    view.getViewer().refresh();
                    getSite().getPage().closeEditor(getSite().getPage().findEditor(getEditorInput()) , false);
                }
            }
        });

    }
When modifying the code, add necessary imports when the eclipse code editor creates error of not finding some classes.
"Delete Student" Command
Add the "DeleteStudent" command to commands extension point and create the Handler Class.
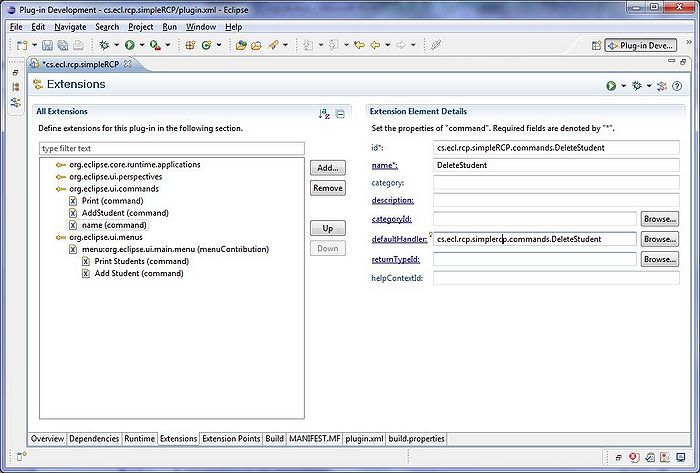
Add the command you just created to the menuContribution extension point.
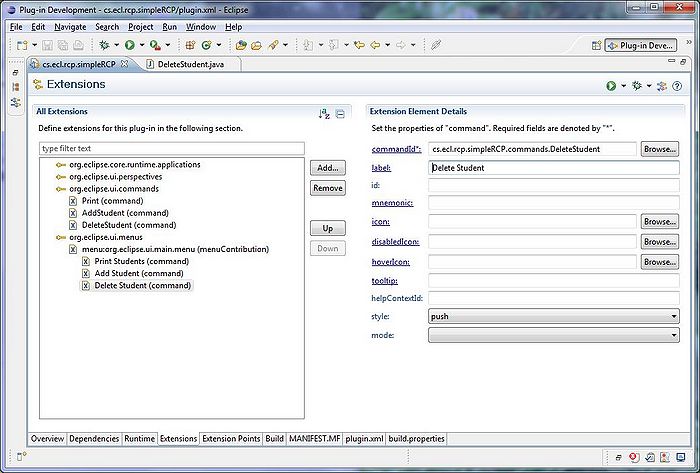
Here is the code for the execute method of the DeleteStudent class. It finds the student(s) that user has selected on the table viewer to delete from the ModelProvider and then refreshes the viewer.
DeleteStudent.java
package cs.ecl.rcp.simplercp.commands;

import java.util.Iterator;
import java.util.List;

import cs.ecl.rcp.simplercp.StudentsView;
import cs.ecl.rcp.simplercp.model.*;

import org.eclipse.core.commands.AbstractHandler;
import org.eclipse.core.commands.ExecutionEvent;
import org.eclipse.core.commands.ExecutionException;
import org.eclipse.core.commands.IHandler;
import org.eclipse.jface.viewers.ISelection;
import org.eclipse.jface.viewers.IStructuredSelection;
import org.eclipse.ui.IWorkbenchPage;
import org.eclipse.ui.IWorkbenchWindow;
import org.eclipse.ui.handlers.HandlerUtil;

public class DeleteStudent extends AbstractHandler implements IHandler {

    @SuppressWarnings("unchecked")
    @Override
    public Object execute(ExecutionEvent event) throws ExecutionException {
        // TODO Auto-generated method stub

        IWorkbenchWindow window = HandlerUtil.getActiveWorkbenchWindow(event);
        IWorkbenchPage page = window.getActivePage();
        StudentsView studentsView = (StudentsView) page.findView(StudentsView.ID);
        ISelection selection = studentsView.getSite().getSelectionProvider().getSelection();


        if(selection!=null && selection instanceof IStructuredSelection){
            List<Student> students = ModelProvider.INSTANCE.getStudents();
            IStructuredSelection sel = (IStructuredSelection)selection;
        // go through all selections if multiple selection is made
            for(Iterator<Student> iterator =sel.iterator();iterator.hasNext(); ){
                Student student = iterator.next() ;
                students.remove(student);
            }

            studentsView.getViewer().refresh();
        }


        return null;
    }

}
"Exit" Command
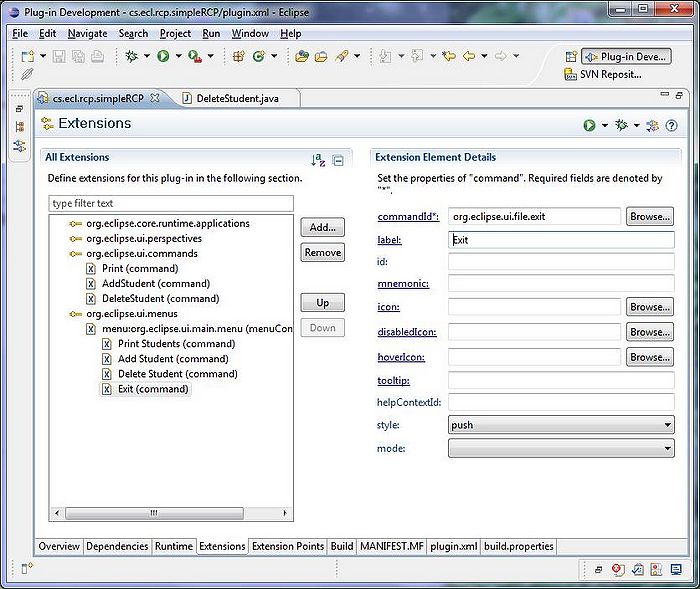
Now we will add the Exit command to our menuContribution Extension point.
Right click on the menuContribution and select New > command. Then set the command's details as follows. It will use the existing exit command in the core commands.
Define Views in The Application
In this part of the tutorial we are going to add a view to our application. We have to create a view and add it to the perspective and make it visible.
Create Views
Click on the Extensions tab in the plugin.xml window in the project and add a new Extension Point as "org.eclipse.ui.views".
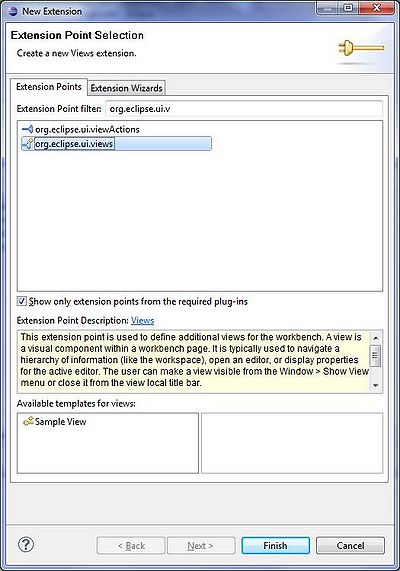
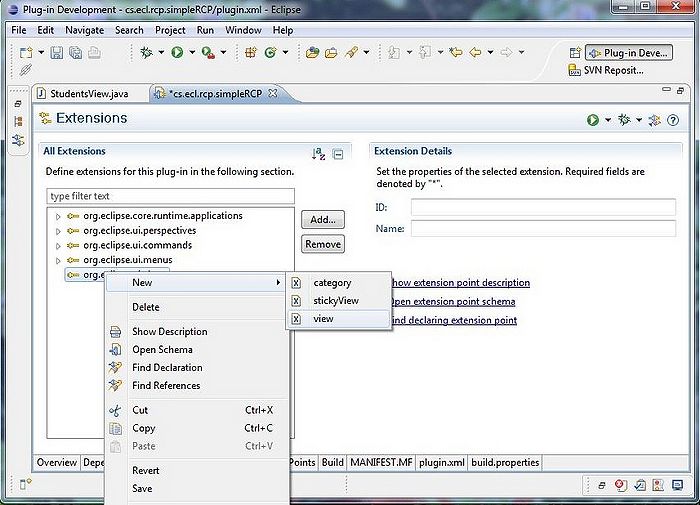
Right click on the newly added Extension Point and choose: New > View.
Then in the details section give the view a Name("StudentView"), id ("cs.ecl.rcp.simpleRCP.StudentView")and a class ("cs.ecl.rcp.simplercp.StudentView").
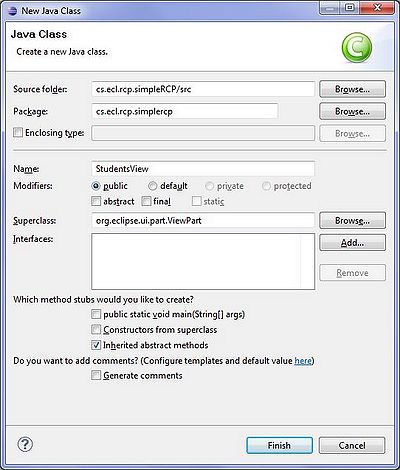
Double click on the class link and the New Java Class window will open. Notice that the StudentView class is a subclass of "org.eclipse.ui.part.ViewPart" class.
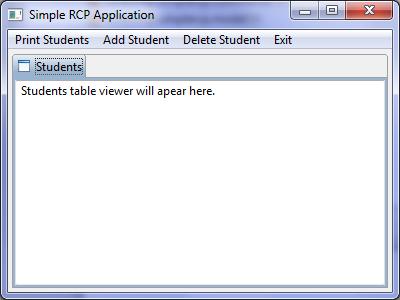
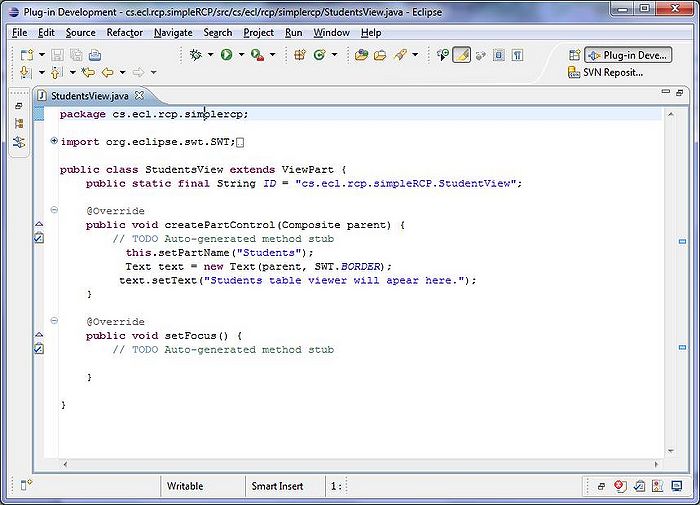
Go to the project in project explorer and find the StudentView in the "cs.ecl.rcp.simplercp" package in the src folder. Here is how it looks like ( we added a text to this view).
Add view(s) to perspective via code
Now we have to add our view to the perspective.We could do this in Extensions window, but here we want to show you how to do it programmatically.
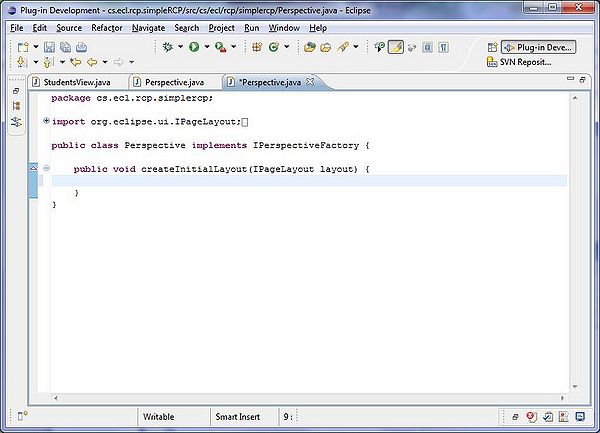
Find the "Perspective" class in src folder of your project in the "cs.ecl.rco.simplercp" package.Here is how it looks like:
Add the following code to add view to the perspective. we also are making the view non-closeable, so that user cannot close it.
Perspective.java
package cs.ecl.rcp.simplercp;

import org.eclipse.ui.IPageLayout;
import org.eclipse.ui.IPerspectiveFactory;


public class Perspective implements IPerspectiveFactory {

    public void createInitialLayout(IPageLayout layout) {

        layout.setEditorAreaVisible(true);
        layout.addView(StudentsView.ID, IPageLayout.LEFT, 1.0f, layout.getEditorArea());
        //make the view fixed
        layout.setFixed(true);
        //make the view non-closeable
        layout.getViewLayout(StudentsView.ID).setCloseable(false);

    }
}