Difference between revisions of "Teams Winter 2011/team2/lab3"
(Created page with 'Place lab 3 tutorial here') |
|||
| Line 1: | Line 1: | ||
| − | + | =Tutorial= | |
| + | |||
| + | ==Prerequisites== | ||
| + | *Download [http://www.eclipse.org/downloads/packages/eclipse-rcp-and-rap-developers/heliossr2 Eclipse RCP & RAP Developer] | ||
| + | |||
| + | ==Create a RCP Application== | ||
| + | *Run Eclipse | ||
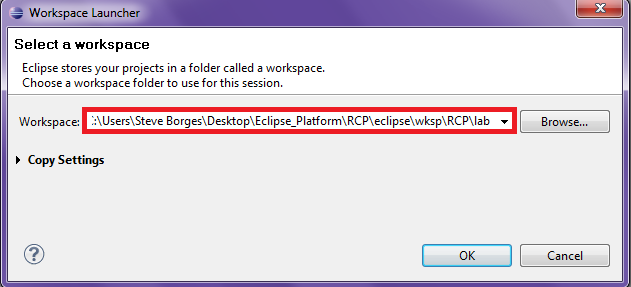
| + | *Select/Enter your preferred workspace in the text box provided and click okay | ||
| + | [[File:RcpwT2.png]] | ||
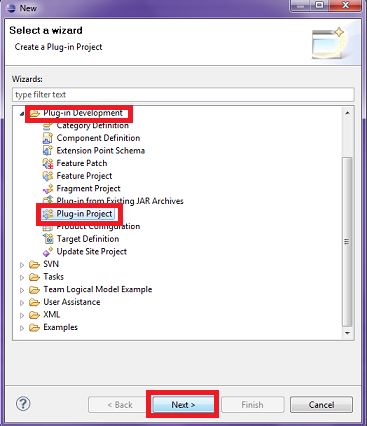
| + | *After Eclipse has completed loaded, create a plug-in project by clicking on "File" on the menu bar then scroll to New->Project->Other. A wizard should pop-up in which you should progress to click on the "Plugin-in Development" tree, select "Plug-in Project", and click next. | ||
| + | [[File:WizwT2.png]] | ||
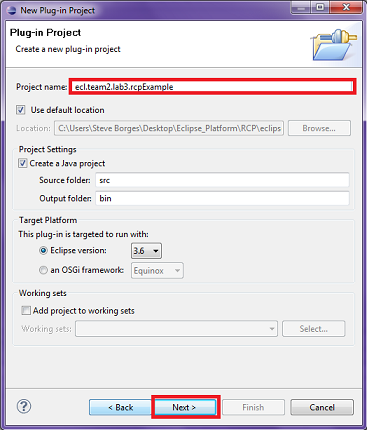
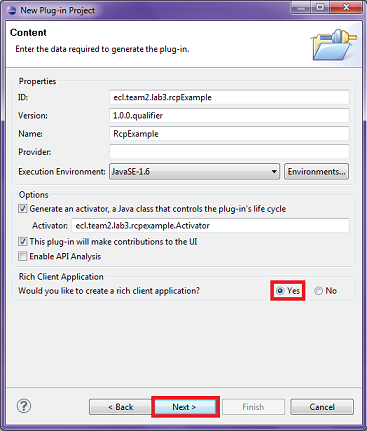
| + | *Enter the following information that is seen in the image below | ||
| + | [[File:Wiz2wT2.png]] | ||
| + | [[File:Wiz3wT2.png]] | ||
| + | [[File:Wiz4wT2.png]] | ||
Revision as of 09:26, 10 March 2011
Tutorial
Prerequisites
- Download Eclipse RCP & RAP Developer
Create a RCP Application
- Run Eclipse
- Select/Enter your preferred workspace in the text box provided and click okay
- After Eclipse has completed loaded, create a plug-in project by clicking on "File" on the menu bar then scroll to New->Project->Other. A wizard should pop-up in which you should progress to click on the "Plugin-in Development" tree, select "Plug-in Project", and click next.
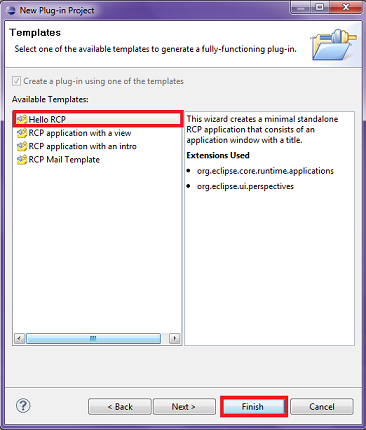
- Enter the following information that is seen in the image below
