Difference between revisions of "OPS235"
| Line 133: | Line 133: | ||
| − | |[[Image: | + | |[[Image:marcos.jpg|thumb|left|225px|<b>Marcos Cavenaghi<br />(Second Half)</b><br />Sections: '''B''' , '''C''' & '''D'''<br /><br /> ]] |
<!-- | <!-- | ||
Revision as of 09:45, 2 May 2014
| Quick Links |
|---|
| Course Outline |
| Assignments |
| Assignment 1 |
Contents
Welcome to OPS235 - Introduction to Open System Servers
What This Course is About
This course is the second in a series of courses about Linux technologies:
- ULI101 taught you to be a Linux user. In OPS235, you will move from being Linux a user to being a Linux system administrator.
- As a system administrator, you will be responsible for installing, configuring, adjusting, maintaining, and troubleshooting the operation of computer systems. This is a lot of responsibility, and with that responsibility comes power. You will be able to change anything on the system, and you will also have the ability to damage or destroy the system.
- In this course you use a removable disk tray with the lab computers to set up a Linux system. You will also set up at least four additional Linux systems using "Virtual Machines", and therefore gain experience with different types of system configurations as well as setting up networking between systems.
- Later courses (OPS335 and OPS435) teach you to administer Linux servers (web servers, DNS servers, FTP servers, file sharing servers) -- and to use more complex scripting to boost your system administration efficiency.
Learning by Doing
Most of the learning in this course occurs through the hands-on problem solving that takes place in the eight labs and two assignments.
Requirements for Success:
- It is very important to stay up-to-date with the coursework, and to practice until you have confidently mastered each task.
- All of the software used in this course is open source software, so you are free to use, modify, and redistribute it. This means that you can install it as many times as you want on as many different computers as you would like. It also means that you can tinker with it -- you can take it apart, see how it works, and put it back together in the same or a different way, limited only by your time and ambition. You are encouraged to experiment and question liberally.
- The notes that you make during the labs and assignments are your reference material for the quizzes, tests, and assignments. Take really good notes, and if you have questions, experiment and consult with your professor.
- Carefully read ALL lab instructions and check your work regularly. The labs have been designed with backup safeguards to prevent the student from losing their work. On the other hand, students may lose their work if they fail to follow lab instructions or accidentally forget their removable hard disks in the workstation's hard disk bay drive!
Course Resources
- OPS235 Weekly Schedule (Course Notes / Labs)
- Course Outline
Supplies Checklist (Required for Second Class)
Bootable Fedora Media (CD/DVD)
| Storage Media | Download and Burning Options | Graphics | ||
|---|---|---|---|---|
| CentOS 6.5 Live DVD (x86_64) and CentOS 6.5 installation DVD1 (x86_64)
|
1. Use Freedom Toaster (in the Open Lab) (click for details)
|
|||
Additional Hardware
| Item | Item Details | Graphic |
|---|---|---|
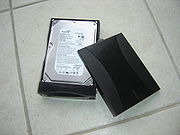
| SATA Hard Disk in Removable Drive Tray | Hard Disk Size: at least 250GB. Please buy the tray from the bookstore as not all trays are compatible. Mechanical shock from dropping a hard drive causes drive failure for several students each semester. If you use a mechanical hard drive, be careful not to drop it, and transport it in a padded container (e.g. wrapped in an old shirt). SSDs are becoming competitive in price, are faster, and are less susceptible to shock, so you may want to look for a deal on an SSD instead of a hard drive -- but check to ensure that your SSD will fit properly into your drive tray. Please tighten the drive screws securely to prevent the tray from jamming in the holder, or leave the screws off. |
|
| USB Flash Drive | At least 8GB, and maybe bigger depending on how many backups you make. You can use this key for other things as well. This is not 100% required but can be very useful when troubleshooting. |
Study Aids
| Item | Item Details | Graphic |
|---|---|---|
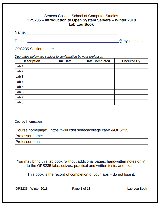
| Lab Log-Book | Download and Print: Lab log book (PDF). Please note that you can use your log book during quizzes, written tests, practical tests and the final exam. It's also the record that you have completed the labs, so don't lose it! |
Important Information
Course Faculty
| During the Spring/Summer 2014 semester, OPS235 is taught by: | |||
|
|
|
Wiki Participation
- You can edit these pages! Please feel free to fix typos or add links to additional resources. Please use this capability responsibly.


