Difference between revisions of "Importing Pictures From a Digital Camera"
| Line 11: | Line 11: | ||
===YouTube Video=== | ===YouTube Video=== | ||
| − | :If you want to see the visual steps for " | + | :If you want to see the visual steps for "Importing Pictures From a Digital Camera", |
:Here is a link to a customized YouTube video: | :Here is a link to a customized YouTube video: | ||
Revision as of 08:05, 29 June 2011
Purpose
- This WIKI explains how to import pictures into the computer system for graphical editing, slide-show presentations, etc...
- This tutorial will use a particular digital camera, but the procedures for other digital cameras will general be the same...
YouTube Video
- If you want to see the visual steps for "Importing Pictures From a Digital Camera",
- Here is a link to a customized YouTube video:
Written Instructions
- Below are the instructions on how to Import Pictures From a Digital Camera:
Importing Pictures
Prior Assumptions
- The camera used for this tutorial was:
- Sony Cyber-Shot P39A
- 5.1 MegaPixel
- MPEG MOVIE VX, Smart Zoom
Creating a Storage Folder
- Prior to importing pictures or video into the computer, it is recommended to create a folder to store the imported images.
- Folder set-up Strategies:
- Create a folder on your USB device for off-site storage.
- Create a folder within the Pictures folder for your account (if number of pictures/video exceed USB storage device capacity).
Connecting the Digital Camera to Computer
- The digital camera bag should contain a USB cable that is used to connect the camera device to a computer.
- Connection Procedure:
- Use the USB cable to connect the camera to the Computer by plugging into a USB slot.
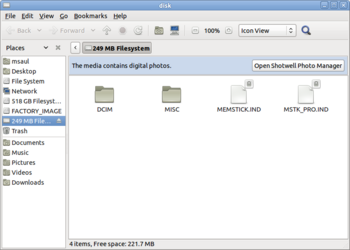
- Select the mode of the camera to "display pictures" (i.e. not camera mode).
- Power-on the camera.
Opening the Camera Device
- To be completed ...
Transferring Pictures
- To be completed ...
Transferring Videos
- To be completed ...
Off-Site Storage Considerations
- To be completed ...
Removal of Transferred Pictures / Videos
- To be completed ...
Additional Resources
- To be completed ...
