Difference between revisions of "Android : Install Eclipse Plugins Fedora"
(→Installing the Android SDK) |
(→Installing the Android SDK) |
||
| (3 intermediate revisions by the same user not shown) | |||
| Line 24: | Line 24: | ||
<li>You may need to install some 32 bit libraries if you're using 64 bit Fedora as I am. | <li>You may need to install some 32 bit libraries if you're using 64 bit Fedora as I am. | ||
<pre> | <pre> | ||
| − | yum install glibc.i686 glibc-devel.i686 libstdc++.i686 zlib-devel.i686\ ncurses-devel.i686 libX11-devel.i686 libXrender.i686 libXrandr.i686 | + | yum install glibc.i686 glibc-devel.i686 libstdc++.i686 zlib-devel.i686\ |
| + | ncurses-devel.i686 libX11-devel.i686 libXrender.i686 libXrandr.i686 | ||
</pre> | </pre> | ||
<li> Download the SDK from http://developer.android.com/sdk/index.html | <li> Download the SDK from http://developer.android.com/sdk/index.html | ||
| Line 44: | Line 45: | ||
<li>Click Install Selected and the download will begin. | <li>Click Install Selected and the download will begin. | ||
[[Image:android-6.png|right|thumb]]<br style="clear:right;" /> | [[Image:android-6.png|right|thumb]]<br style="clear:right;" /> | ||
| − | <li> | + | <li>When the downloads complete, check the Installed Packages |
| + | [[Image:android-7.png|right|thumb]]<br style="clear:right;" /> | ||
| + | <li>Now select Virtual Devices. You should see one Android device configured. | ||
| + | [[Image:android-8.png|right|thumb]]<br style="clear:right;" /> | ||
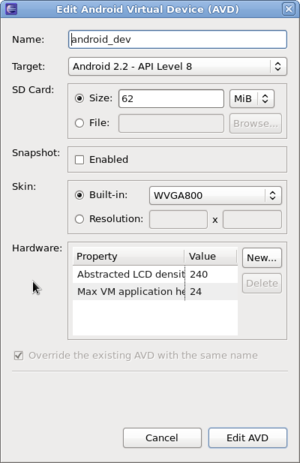
| + | <li>Click the Edit button to verify the setup. | ||
| + | [[Image:android-9.png|right|thumb]]<br style="clear:right;" /> | ||
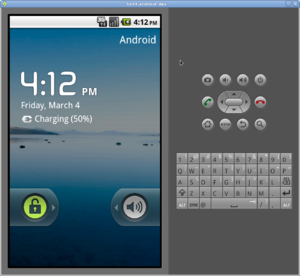
| + | <li>You can then click on the Start button to see your Android phone in action | ||
| + | [[Image:android-10.png|right|thumb]]<br style="clear:right;" /> | ||
| + | <li>Congratulations, you're now ready to develop Android applications for the 2.2 platform. | ||
</ol> | </ol> | ||
Latest revision as of 11:16, 4 March 2011
Contents
Installing Android Development Tools on Fedora x86_64
For Android developent on Fedora you'll need the following:
- Eclipse
- Android Eclipse Plugin
- Android Software Development Kit
Installing Eclipse onto Fedora 14 - X86_64
- Start with a clean install of Fedora 14, preferably from a live CD. For my examples I used the 64 bit edition.
- When the install is complete, open a terminal window and run yum update to bring your system up to date. You may have to reboot once this is done.
- Install Eclipse (Helios 3.6.1) with the command yum groupinstall "Fedora Eclipse".
- That's it! You can now use Eclipse to build C, C++ or Java programs.
Installing the Android Eclipse Plugin
- From the Eclipse Help menu select Install New Software
- Click on Available Software Sites and check the box next to download.eclipse.org/releases/helios then click Ok
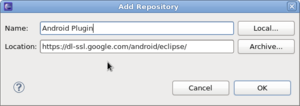
- Back in the Available Software window click on the Add button and add the Android repository https://dl-ssl.google.com/android/eclipse/
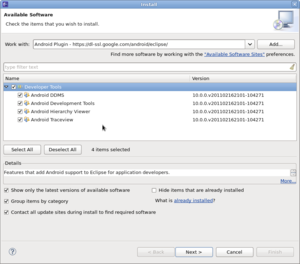
- Check the box for Developer Tools
- Once you review what will be downloaded, you'll need to check the box next to Accept the License then click Finish. Downloading of the plugin should start.
- When the download completes you'll need to restart Eclipse.
Installing the Android SDK
- You may need to install some 32 bit libraries if you're using 64 bit Fedora as I am.
yum install glibc.i686 glibc-devel.i686 libstdc++.i686 zlib-devel.i686\
 ncurses-devel.i686 libX11-devel.i686 libXrender.i686 libXrandr.i686
- Download the SDK from http://developer.android.com/sdk/index.html
- I downloaded the file android-sdk_r10-linux_x86.tgz
- Unarchive the file using "tar xvzf android-sdk_r10-linux_x86.tgz"
- You now have a directory named android-sdk-linux_x86/
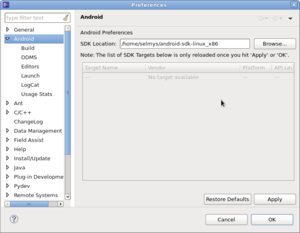
- Start Eclipse and from the Window menu select Preferences
- Select Android and enter the location of your SDK and click Ok
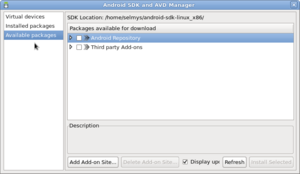
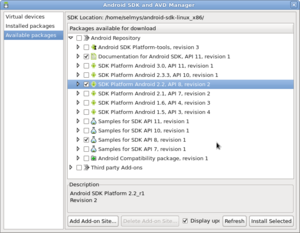
- From the Window menu select Android ADK and AVD Manager. Then select Available Packages.
- Check the packaged you want to install. I selected
- Documentation for Android SDK, API 11, revision 1
- SDK Platform Android 2.2, API 8, revision 2
- Samples for SDK API 8, revision 1
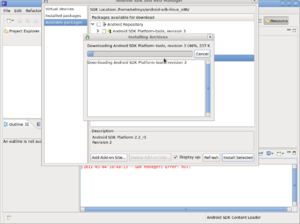
- Click Install Selected and the download will begin.
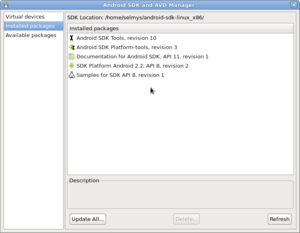
- When the downloads complete, check the Installed Packages
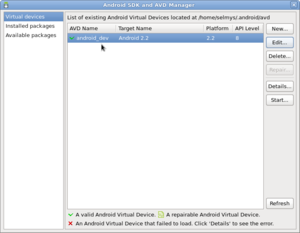
- Now select Virtual Devices. You should see one Android device configured.
- Click the Edit button to verify the setup.
- You can then click on the Start button to see your Android phone in action
- Congratulations, you're now ready to develop Android applications for the 2.2 platform.
