Difference between revisions of "Polling Module Instructions"
JTRobinson (talk | contribs) |
JTRobinson (talk | contribs) |
||
| (One intermediate revision by the same user not shown) | |||
| Line 1: | Line 1: | ||
| − | |||
| − | |||
| − | |||
==Creating a Poll== | ==Creating a Poll== | ||
===Figure 1=== | ===Figure 1=== | ||
| Line 53: | Line 50: | ||
===Figure 2=== | ===Figure 2=== | ||
Check the "Enable web polling" box. In the example, the multiple-selections box has also been checked; this is not necessary for all web polls. | Check the "Enable web polling" box. In the example, the multiple-selections box has also been checked; this is not necessary for all web polls. | ||
| + | |||
[[Image:webpoll-modify.png|400px|Fig. 2]] | [[Image:webpoll-modify.png|400px|Fig. 2]] | ||
===Figure 3=== | ===Figure 3=== | ||
The preview window appears the same as for an ordinary poll, except for the notice in red that "This poll will be available for web polling." | The preview window appears the same as for an ordinary poll, except for the notice in red that "This poll will be available for web polling." | ||
| + | |||
[[Image:webpoll-preview.png|400px|Fig. 3]] | [[Image:webpoll-preview.png|400px|Fig. 3]] | ||
===Figure 4=== | ===Figure 4=== | ||
In the viewer clients, voting proceeds the same way. Note that in this example, checkboxes were enabled. | In the viewer clients, voting proceeds the same way. Note that in this example, checkboxes were enabled. | ||
| + | |||
[[Image:webpoll-checkboxes.png|400px|Fig. 4]] | [[Image:webpoll-checkboxes.png|400px|Fig. 4]] | ||
===Figure 5=== | ===Figure 5=== | ||
In the presenter's client, the web polling URL has been generated and displayed, as well as in the chat notification. The presenter can distribute this URL to anyone they wish to have vote in the poll who is not present in the meeting. | In the presenter's client, the web polling URL has been generated and displayed, as well as in the chat notification. The presenter can distribute this URL to anyone they wish to have vote in the poll who is not present in the meeting. | ||
| + | |||
[[Image:webpoll-url.png|400px|Fig. 5]] | [[Image:webpoll-url.png|400px|Fig. 5]] | ||
===Figure 6=== | ===Figure 6=== | ||
The voting page appears to anyone who visits the URL in simple HTML, suitable for mobile devices. The URL only allows each user to vote once, and the page is destroyed when the poll closes; if the poll is republished, a new URL will be generated. | The voting page appears to anyone who visits the URL in simple HTML, suitable for mobile devices. The URL only allows each user to vote once, and the page is destroyed when the poll closes; if the poll is republished, a new URL will be generated. | ||
| + | |||
[[Image:webpoll-webpoll.png|400px|Fig. 6]] | [[Image:webpoll-webpoll.png|400px|Fig. 6]] | ||
===Figure 7=== | ===Figure 7=== | ||
Web votes are registered in the statistics the same as votes from within the meeting. Web users are not tracked by "Did Not Vote." | Web votes are registered in the statistics the same as votes from within the meeting. Web users are not tracked by "Did Not Vote." | ||
| + | |||
[[Image:webpoll-results.png|400px|Fig. 7]] | [[Image:webpoll-results.png|400px|Fig. 7]] | ||
Latest revision as of 17:19, 10 May 2012
Contents
[hide]Creating a Poll
Figure 1
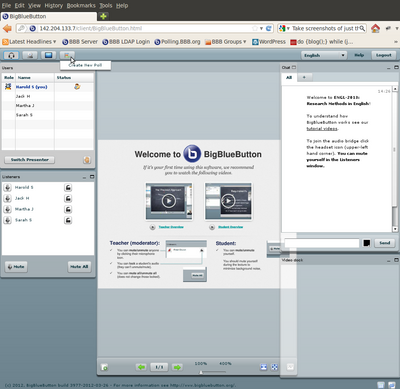
To begin, click the Polling icon and select Create New Poll.
Figure 2
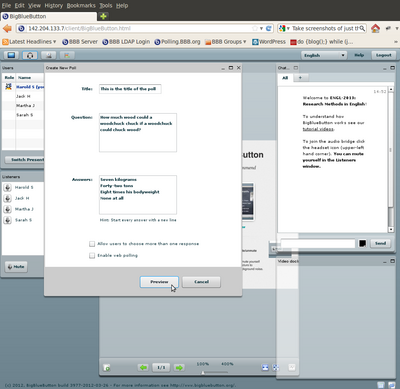
This brings up the Create New Poll window. Here you enter the title of the poll (this will identify the poll in the menu), the question you wish to ask, and the available answers. You must have at least two answers. Checkboxes let you control whether the viewers must select one option or if they may select multiple options, and also whether to enable web polling (see section Web Polling). Click Preview when you are done.
Figure 3
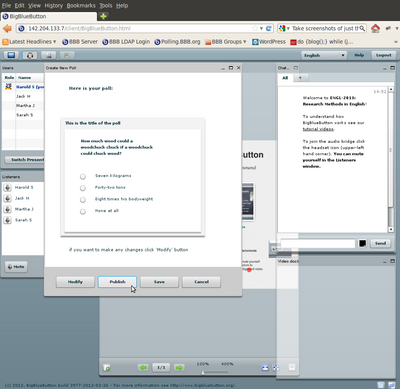
The Preview pane shows you how your poll will look to the viewers. You can click Modify to return to the Create New Poll screen and change the information you already entered. Click Publish to open voting to the viewers. Click Save to store the poll on the server for later use.
Figure 4
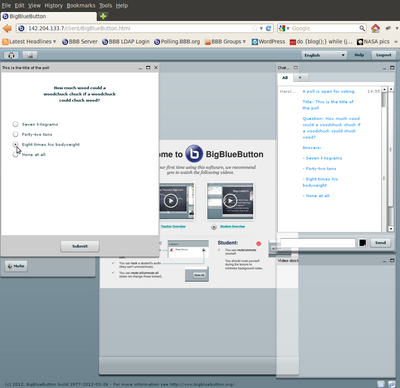
Each of the viewers will see a voting window appear in their client, with the same information displayed in the preview. Viewers can then select an option (or all that apply, if the presenter has enabled this) and click Submit, or a abstain from voting by closing the window. The title, question, and answers of the poll will be displayed in the Chat window for all participants of the meeting.
Figure 5
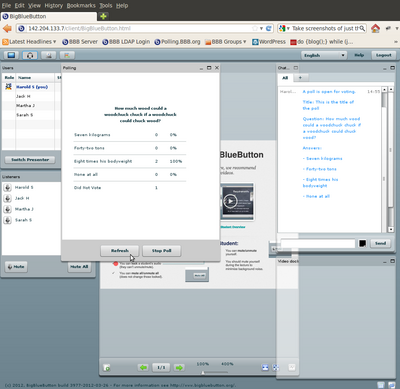
Simultaneously when the voting windows appear for viewers, the Statistics window appears for the presenter. Here the presenter can click Refresh to see the results while voting is still open, or click Stop Poll to close voting. Clicking Stop Poll also closes all voting windows still open in viewer clients, tallying them as "Did Not Vote."
Figure 6
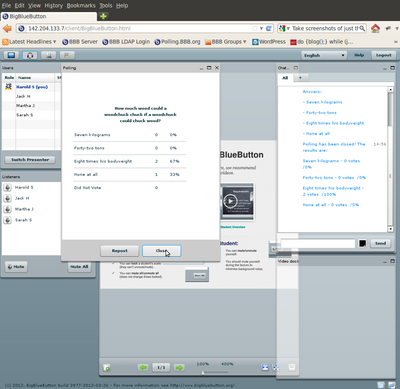
When voting closes, the buttons in the Statistics window change. Refresh changes to Repost, and Stop Poll changes to Close. Clicking Repost will reset all poll statistics and re-open voting. Clicking Close will store the results on the server for later review and close the Statistics window. The results of the poll will be displayed in the Chat window for all participants of the meeting.
NOTE: Poll statistics exist only as long as the room in which the poll was created. If you would like to keep your data, you must record it externally.
Figure 7
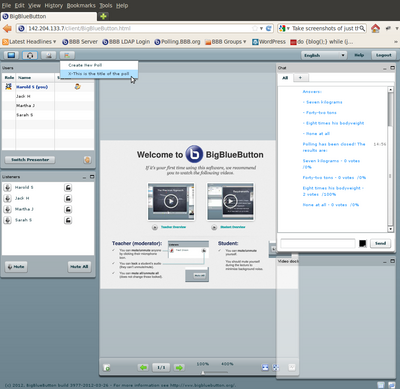
Once a poll has been published, voted on, and closed, it will be visible in the Polling Menu by clicking the Polling icon. The poll's status of being already published is indicated by an X in front of the title. Clicking on the title will reopen the Statistics window as it looked at the close of polling.
Figure 8
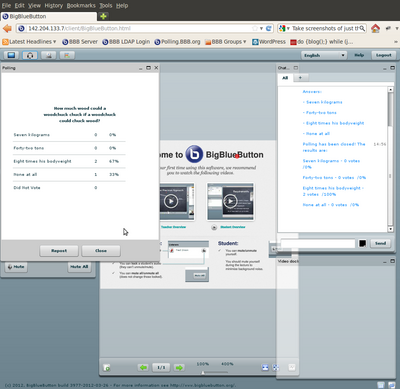
The statistics of the poll will persist from the last time the poll was published. As at the original close of polling, you can repost the poll, or close the Statistics window. A poll can be republished as often as necessary.
Web Polling
Figure 1
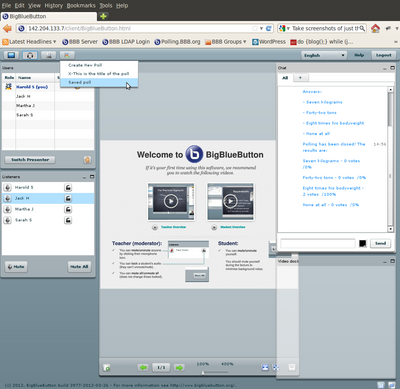
To make a poll available for web voting, you can start with a new poll or one that you have already saved (but not published)
Figure 2
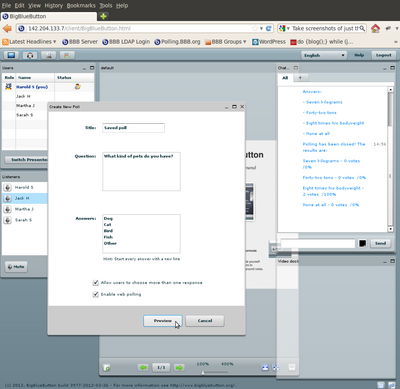
Check the "Enable web polling" box. In the example, the multiple-selections box has also been checked; this is not necessary for all web polls.
Figure 3
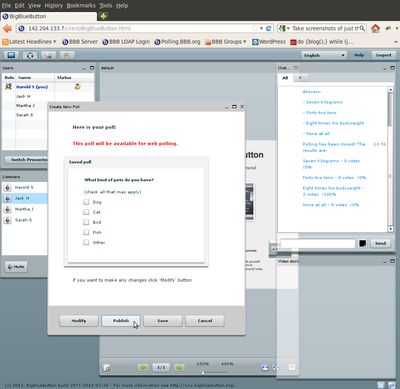
The preview window appears the same as for an ordinary poll, except for the notice in red that "This poll will be available for web polling."
Figure 4
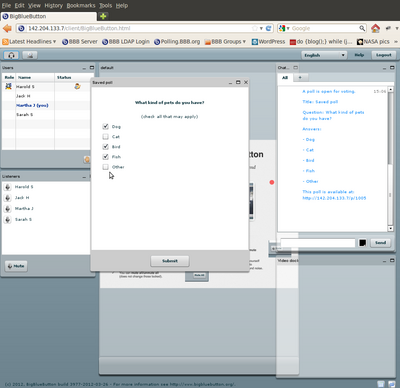
In the viewer clients, voting proceeds the same way. Note that in this example, checkboxes were enabled.
Figure 5
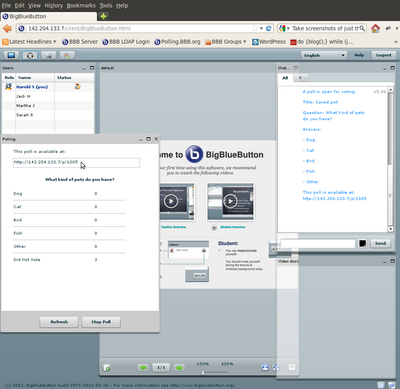
In the presenter's client, the web polling URL has been generated and displayed, as well as in the chat notification. The presenter can distribute this URL to anyone they wish to have vote in the poll who is not present in the meeting.
Figure 6
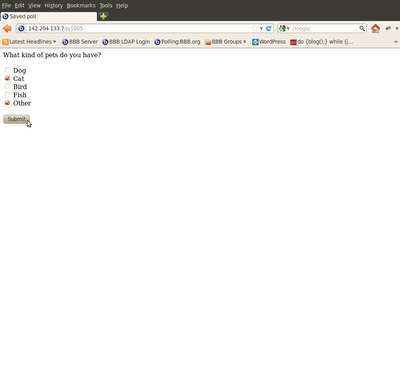
The voting page appears to anyone who visits the URL in simple HTML, suitable for mobile devices. The URL only allows each user to vote once, and the page is destroyed when the poll closes; if the poll is republished, a new URL will be generated.
Figure 7
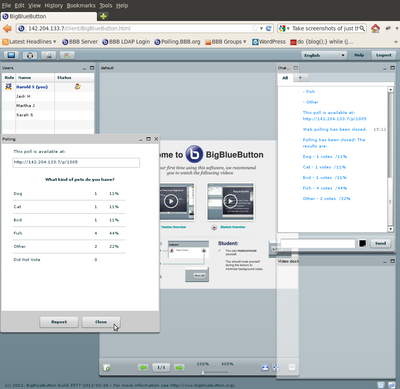
Web votes are registered in the statistics the same as votes from within the meeting. Web users are not tracked by "Did Not Vote."
