Difference between revisions of "Recording with Ardour"
(Created page with '''Hands-down, '''Ardour''' is a more comprehensive tool to perform studio recording. Although there is a learning curve associated with Ardour, this instructional WIKI should pro…') |
(No difference)
|
Revision as of 09:00, 25 June 2011
Hands-down, Ardour is a more comprehensive tool to perform studio recording. Although there is a learning curve associated with Ardour, this instructional WIKI should provide the basics to allow you to create your own works of art!
Contents
Prior Assumptions
I am using the following Hardware to connect to Ubuntu Studio:
- installed Ubuntu Studio with the Real-Time Kernel
- Connected a Tascam US-122 Audio/MIDI USB device (confirmed that green light is "on").
If you haven't been able to get your Tascam US-122 device to work, click on the link below and CAREFULLY READ THE INSTRUCTIONS:
https://help.ubuntu.com/community/TASCAM_US-122)
This instructional tutorial assumes that you have already setup the Jack Audio Server, and are running Qsynth.
Perform this previous tutorial on how to setup the Jack Audio and run Qysynth before proceeding with this tutorial (link displayed below).
[ Quick & Simple - Setting up Jack Server and Q-synth ]
Simplifying the Process
While I have been playing with my initial home Ubuntu recording studio, I have come noticed some interesting concerns and have learned how to overcome those concerns:
| Concern | Solution |
| Too many applications to handle on a single monitor (too much switching) |
Configure computer system to use multiple monitors (for example, 2, 3 or 4 monitors) |
| Too many switches to turn on and off | Plug as many devices into a power outlet bar, easy to turn on and off devices as same time |
| Too many applications to launch & setup connections (patches) | Write a shell script to be run at startup to automate all startup tasks Here is a link to a partially completed shell script I created: [ txt ] |
Layout of This Tutorial
I will NOT be going step-by-step on how to launch each application. Please study the shell script link (above) a learn how it works. You can refer to the tutorial Quick & Simple - Setting up Jack Server and Q-synth ] to get a "feel" how to make connections in Jack audio server to the Bristol Organ and Qsynth Keyboards, etc...
I will be concentrating on working with the running applications, assuming they have already been installed, launched and connected (patched) via the shell script.
Creating a New Ardour Session
Ardour is similar to Audacity application since is designed to create, edit and produce an auditory product.
On the other hand, Ardour is more comprehensive than Audacity in terms of its editing capabilities. Unfortunately, many people are "turned-off" from Ardour since they believe it will take a long time to learn - that is not the case. It took me more time to learn how to launch and connect various musical devices to the Jack server as opposed to learning how to use Ardour. Having the knowledge from using the Audacity application, I learned how to use Ardour to create a song within 30 minutes...
Creating an Ardour Session
In my tutorial, it is assumed that Ardour was automatically launched by my shell script, but you can also manually launch Ardour (assuming that the Jack audio server) has already been launched. Below are the steps to manually launch Ardour:
Steps to Launch Ardour / Create New Session
- In Applications menu bar, then select Sound & Video -> Audio Production -> Ardour GTK2
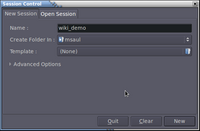
- The Ardour Session Control Dialog Box will appear.
Note that you will always be presented with an option to either create a new session, or open (an existing) session (just select the appropriate tab, the default tab is "new session.) - For our example, we will create a new session called wiki_demo. Type the name "wiki-demo" in the Name input textbox, and then click the New button.
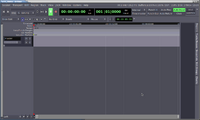
- The main Ardour window will appear.
NOTE: click on the diagrams to the right for a larger image...
Adding a Track / Bus
Unlike Audacity, you must first create a track before recording it. In Ardour, they make reference to a Track or a Bus (we will not be discussing busses in this tutorial). Please note the steps below to create a Track or Bus:
Steps to Create a Track / Bus
- In the Ardour main window, click Session menu bar, then select Sound & Video -> Audio Production -> Ardour GTK2
- The Ardour Add Track/Bus Dialog Box will appear.
- For instruments such as Hydrogen Drum machine or keyboards, set Channel configuration to Stereo. When adding Tracks for vocals, or guitars the input may be mono, so in that case you can leave the Channel Configuration to Mono.
- Then click the Add button.
- The track should now appear in the Ardour main window. You may notice the track is colored. Each separate track is assigned a different color to prevent confusion (especially when working with the input device mixer - to be discussed later).
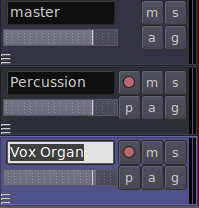
- Click in the name area and type the track name "Percussion", then click outside the text area. Naming your tracks helps to prevent confusion, so don't be afraid to give your tracks descriptive names.
Displaying Ardour Mixer / Selecting Input Device
Now that we have created a track, we need to select an input device to record. We will select the Hydrogen application to create a drumming pattern for our recording session. Personally, I prefer real drums, but a drum machine can be helpful in the song creation process...
In order to select our input device, we need to launch the Ardour Mixer. In order to launch the Ardour Mixer, you make the following menu selections:
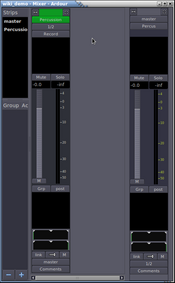
WINDOW -> Show Mixer
The Ardour Mixer dialog box should appear. I prefer to move it into the other screen...
Also note that once a song is saved, your system will return your Ardour mixer to the same screen location for convenience in case you are using multiple monitors! But since this was a new session, you would be required to move the mixer manually to the desired screen location....
- In the Ardour Mixer window, Click on the button/box just below the Percussion track (labelled "1/2"), and then select edit.
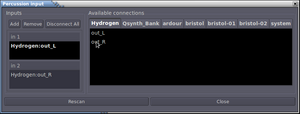
- The input dialog box for that track appears.
- Click each of the inputs boxes (on left-hand side) labelled "in 1" and "in 2". This should remove the basic default inputs.
- Click the "out_L" and out_R" characters listed below in Available Connections.
- You have now set up the Percussion Track to record from the hydrogen drum machine.
- Click the Close button.
If you try to use the Hydrogen application to play the drums, you will NOT see any activity levels in your Percussion Track in the Ardour Mixer.
You must first, arm your track and arm the Ardour application in order to record. You can easily be tricked into thinking that it will record, since the sound from the Hydrogen drum machine is patched into your system output. Therefore, when you record without arming your tracks, ardour will not capture your recording session!
Arming the Tracks / Recording Percussion Using Hydrogen Drum Machine
Before getting recording levels, or recording your drums, you must first arm your percussion track, and also arm Ardour.
The term "arming tracks" refers back to the age of recording studios that used magnetic tape to record instruments. Ardour uses the same analogy to keep things consistent.
STEPS TO ARM TRACK AND ARDOUR
- Return to the Ardour Main Window.
- In the Percussion track, click on the button that appears as a red ball.
- The button should now display in pink to indicate that the track is armed.
- Near the top of the Ardour application window (area is referred to the transport area), click on the button that appears as a larger red ball.
- The button should now display in pink to indicate that Ardour is ready to record the session.
- Go to the Hydrogen drum machine, click the play button, and start building your drumming pattern by clicking on an instrument within the 4 beat pattern. You can click on a "marked" drum beat to remove it. If you are not certain how to lay down a drum beat, you can select pre-made drumming patterns or songs...
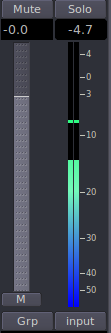
- As you listen to the drumming pattern, you should notice that the input levels in for Percussion in the Ardour Mixer are starting to register.
- When you are ready, simply click the play button in the transport section of the Ardour main window, and then click the stop button when completed.
- To verify the recording, click the rewind button, and then click the play button to listen to your drumming session.
Refer to the diagrams on the right-hand side for reference when arming, and recording your tracks...
NOTE: It is highly recommended to unarm your track and unarm Ardour once you are happy with your track recording session...
Note that after recording, the color of your recorded percussion track corresponds to the color of your percussion track in the Ardour Mixer...
You basically follow the same procedures to Add a Track, Select device Input (i.e. select another instrument), Arm the Track and Ardour, and then record your session.
One essential step that is missing is to add effects to your recording session. This is where Ardour is better at recording than Audacity. The next section will discuss how to setup your Ardour session to hear a special effect added to your sessions WHILE you are playing the instrument at the same time....
For the next section, we will create a Track for the Vox Continental Organ, and add the reverb effect using the calf effect plugin...
Adding Vox Organ Track / Adding Reverb Effect
I am assuming for this tutorial that you have launch the Bristol Hammond B3, Vox, and Rhodes Piano keyboards...
Preform the following steps to Add other Track called "Vox Organ": (If unsure, follow the steps discussed above)
- Create a new stereo track called Vox Organ.
- In the Ardour Mixer, set the Input Device as Vox Organ for right and left channel
(This will appear as Bristol, Bristol-01, Bristol-02 depending which one was launched in sequence). - Arm the Vox Organ track and arm Ardour for recording.
Refer to the diagram on the right-hand side for reference.
When playing the Vox organ, it sounds nice, but it may be better to add a little reverberation (or "reverb") to soften this high-pitched organ sound in order to make it blend in better with the other instruments. We will be added in an effect which will be running a plug-in called Calf Reverb..
STEPS TO ADD REVERB TO VOX ORGAN
- Go to the main Ardour Window.
- In the Ardour main menu, click OPTIONS -> MONITORING -> Ardour Does Monitoring (instead of "Jack Does Monitoring"). This will allow you to hear the reverb when your actually play the Vox organ. This feature is an improvement over Audacity where you would have to add that effect AFTER your record your instrument (like the Vox organ)...
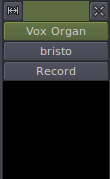
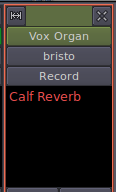
- In the Ardour Mixer Window for Vox Organ, right click in the black space below the Record button (which, in turn, is below the button you clicked to select the bristol (Vox) organ)...
- Click New Plugin in the content menu, and another menu open (called a sub-context menu). In the sub-context menu, click Plugin Manager.
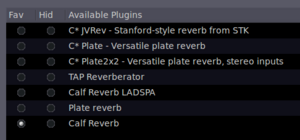
- A Plugin Dialog box will appear. This is an easy method to select your type of plugin effect by simply typing the name of the effect in the Name contains textbox.
- Type reverb in the Name contains textbox.
- All reverb plugins are displayed. Click Fav (or Favorite) radio button beside Calf Reverb. This effect plugin will now be stored as a favorite for quick access next time...
- Click the Close button.
- Again, right click in the black space below the Record button, click New Plugin, then click Favorites, and select Calf Reverb.
- The Calf Reverb effect plugin now is displayed in the black space below the Record button.
- Double-Click on that text "Calf Reverb".
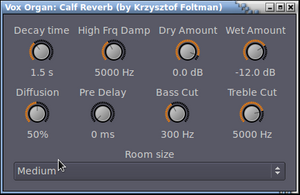
- The Calf Reverb Plugin Window appears. Set the reverb at the bottom to Medium.
Play the organ. You should now hear reverb as you play!
Record your Organ track and then unarm the track and unarm Ardour when you completed your track recording...
Mixing Session to an OGG File
To be completed...
Links to Ardour Manual
The "Official" Ardour Manual is currently being developped. These are links to the next best (more complete) manual:
