Difference between revisions of "File Management"
(Created page with '== Introduction / Purpose == To be completed... == Procedures for Managing Workstations == === YouTube Video === : '''If you want to see the visual steps for "File Managemen…') |
(No difference)
|
Revision as of 06:45, 17 June 2011
Contents
Introduction / Purpose
To be completed...
Procedures for Managing Workstations
YouTube Video
- If you want to see the visual steps for "File Management", here is a link to a customized YouTube video: http://www.youtube.com/watch?v=_DsoidBjbjY
Written Instructions
- Below are the written instructions (in case you prefer to have a printout of these procedures):
Before Starting Italc
In order to use the Italc application to manage computer workstations, it is assumed that you correctly followed the procedures to startup the computer lab.
Here is a link to Start-Up Procedures for the Computer Lab:
- Written Startup Instructions: [ How to Power Up Computer lab ]
- YouTube Video Instructions: [ http://www.youtube.com/watch?v=CTE0e_hH3tE ]
It is assumed that you have logged into the computer server as the "teacher" account prior to using the Italc application.
Launching Italc Application
To launch the Italc application, double-click on the Manage Workstations icon.
You may be prompted to enter the same password that you used to log into the teacher account.
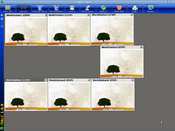
The application window will appear, and display the current computer workstation configuration (refer diagram at the top of this wiki for reference):
- Workstation resembles a "horse-shoe" pattern.
- Top left workstation is workstation #1.
- Workstations increase in number as you move around the horse-shoe.
- The last workstation on the bottom right is workstation #7.
NOTE: For best results, the teacher should log in ALL computer accounts during the computer lab session.
- For example, use:
- jamm1 -> jamm7 accounts for workstation #1 -> workstation #7
- studio1 -> studio7 accounts for workstation #1 -> workstation #7
NOTE: If you do NOT intend to use the data display projector for the computer session, you still need to run the Italc program, and restart the Data Display Projector in order to quickly log-out student accounts, power-down the workstations, and to power-down the computer server...
Useful Features of Italc
There are many features that the Italc application provides in the Computer Lab learning environment including:
Viewing all student Activity
|
Focus on a Particular Student Account
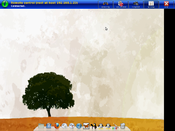
- In order to focus on a specific student's desktop (account), simply point on the workstation, and double-click.
- There are some advantages for the teacher to use this strategy:
- Allow the student to demonstrate with instructor watching (without "hovering" over workstation)
- Provides a method to have a student demonstrate a technique or skill, and allow other students to view data display projection to learn, then practice technique on their own workstation.
- Instructor has control over the student's mouse pointer (in addition to the student) to help guide the student in learning
- SUGGESTION: It is recommended for the instructor to guide, not necessarily take full control away from the student while they are learning...
Lock all Student Computer Accounts
Full Screen / Windowed Demo
|
Log-off and Power Down all Workstations
- Prior to shutting down students' workstations, all students are required to correctly save their work, and close all applications. The instructor can use the Italc application to verify that the students have correctly performed those tasks.
- In order to log-off active student accounts and shutdown the workstation CPUs, simple click on the Power Down button. The instructor will be prompted to confirm shutdown of all active accounts. When the instructors confirms yes, all of the students' accounts will be logged-out and the workstation CPUs will be powered down within 2 seconds! Due to the architecture of this lab, this is not dangerous, and does not pose a risk to students' loss of work.
- The instructor can now proceed with "Grabbing Student Work", and/or "Shutting Down the Computer Lab"
- NOTE: The Power-on button does not work, and can be ignored since the user can start all workstations by clicking the Start Workstations icon in the Teacher's desktop. This application does not allow remote student or automatic student login from the Teacher account. The reasons for these restrictions are based on security.
Additional Resources
- Italc User Manual: [ pdf ]
- Main Italc website: [ html ]
- Additional Italc Youtube video (overview): [ http://www.youtube.com/watch?v=QbMnpYRybcM ]


