Difference between revisions of "Teams Winter 2011/team1/Android/Add Options Menu"
| Line 10: | Line 10: | ||
4.5. Run the application and press the menu button. You should see newly added menu item:<br/> | 4.5. Run the application and press the menu button. You should see newly added menu item:<br/> | ||
[[Image: A_menu4.png | 450px]]<br/> | [[Image: A_menu4.png | 450px]]<br/> | ||
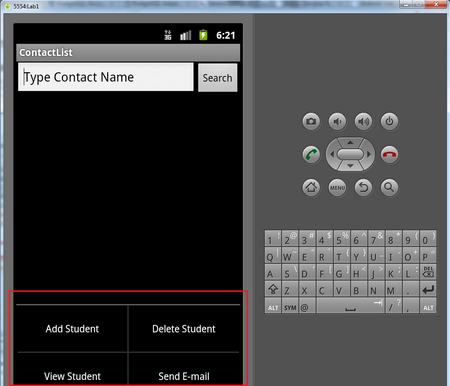
| − | 4.6. Repeat the same steps to add Delete Student, View Student and Send Email | + | 4.6. Repeat the same steps to add Delete Student, View Student and Send Email: |
| + | [[Image: A_menu5.png | 450px]] | ||
Revision as of 13:24, 25 March 2011
4. Add Options Menu
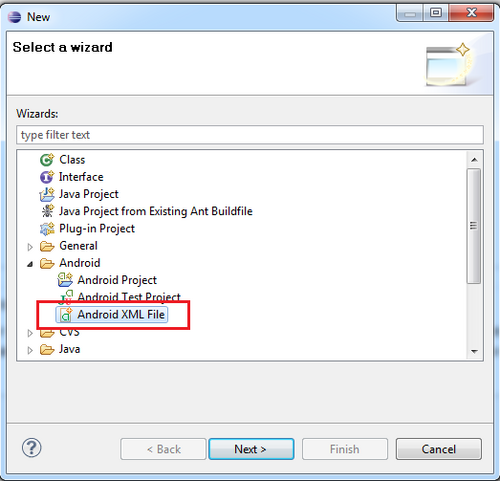
4.1. Add Android xml file to the project: Right Click Project -> New -> Other... -> Android XML File
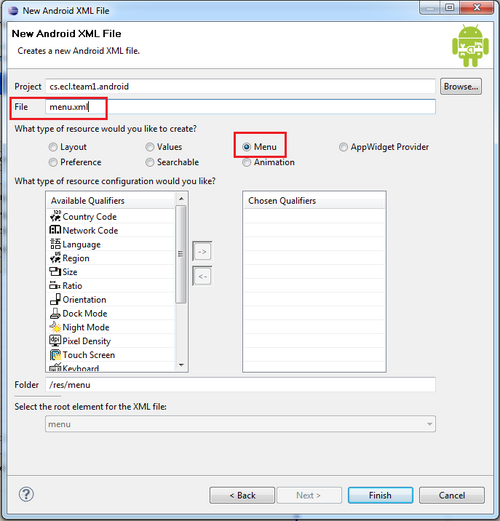
4.2. Specify the file name menu.xml and select "Menu" as type of resource and click Finish
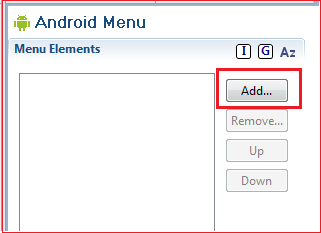
4.3. Go to the menu folder and double click the menu.xml file. Android Menu screen appears. Click Add...:
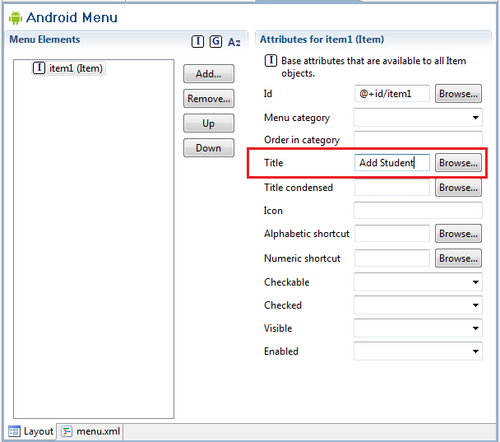
4.4. Select Item and click OK. On the Android Menu screen specify the menu option Title and save the application:
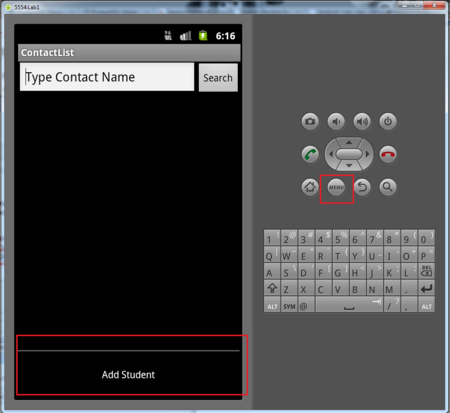
4.5. Run the application and press the menu button. You should see newly added menu item:
4.6. Repeat the same steps to add Delete Student, View Student and Send Email:
