Difference between revisions of "Add Menu to RCP Application"
(→Add Menu to RCP Application) |
(→Add Menu to RCP Application) |
||
| (16 intermediate revisions by the same user not shown) | |||
| Line 3: | Line 3: | ||
* Start Eclipse and check out the example from our course's SVN repository. | * Start Eclipse and check out the example from our course's SVN repository. | ||
* Run the example and you should get something like this: | * Run the example and you should get something like this: | ||
| + | [[Image:rcp-menu-1.png|left|thumb]]<br style="clear:left;" /> | ||
| + | * We'll now create a command (Exit) which we will later add to the menu (File) that we have yet to create. | ||
| + | * Start by double clicking plugin.xml in the Package window. This will bring the plugin.xml file into the edit window. | ||
| + | * Now click on the Extensions tab. You should see this: | ||
| + | [[Image:rcp-menu-2.png|left|thumb]]<br style="clear:left;" /> | ||
| + | * Click the Add button and select "org.eclipse.ui.commands" and click Finish. | ||
| + | [[Image:rcp-menu-3.png|left|thumb]]<br style="clear:left;" /> | ||
| + | * Right click on the ui.commands extension you just added and select New -> Command. | ||
| + | [[Image:rcp-menu-4.png|left|thumb]]<br style="clear:left;" /> | ||
| + | * Enter the id, name and defaultHandler as shown. i.e. id is cs.ecl.rcp.simple.book.Exit, name is Exit and defaultHandler is cs.ecl.rcp.simple.book.ExitHandler. | ||
| + | [[Image:rcp-menu-5.png|left|thumb]]<br style="clear:left;" /> | ||
| + | * Click on the hyperlink "defaultHandler" to create the class which should extend "org.eclipse.core.commands.AbstractHandler". Remove any interfaces. You should have something like this. | ||
| + | [[Image:rcp-menu-6.png|left|thumb]]<br style="clear:left;" /> | ||
| + | * Click Finish. You should now have this. | ||
| + | [[Image:rcp-menu-7.png|left|thumb]]<br style="clear:left;" /> | ||
| + | * Modify the class so it now looks like this. | ||
| + | [[Image:rcp-menu-8.png|left|thumb]]<br style="clear:left;" /> | ||
| + | * Ok, we've created a command, so now we need a menu in which to add it. | ||
| + | * Go back to the plugin.xml view and click the Add button. Then select the "org.eclipse.ui.menus" extension and click Finish. | ||
| + | [[Image:rcp-menu-9.png|left|thumb]]<br style="clear:left;" /> | ||
| + | * Now, right click on the menus extension and select New -> MenuContribution. Then add the location URI as "menu:org.eclipse.ui.main.menu". You'll get something like this. | ||
| + | [[Image:rcp-menu-10.png|left|thumb]]<br style="clear:left;" /> | ||
| + | * Right click on menuContribution and select New -> Menu. Add a menu with the label "File" and the id "fileMenu". | ||
| + | [[Image:rcp-menu-11.png|left|thumb]]<br style="clear:left;" /> | ||
| + | * Right click on File(menu) and select New -> command. Then set the commandid, label and tooltip to "cs.ecl.rcp.simple.book.Exit", "Exit" and "Exits the Application". | ||
| + | [[Image:rcp-menu-12.png|left|thumb]]<br style="clear:left;" /> | ||
| + | * Save your work and then go back to the Overview tab and click on "Launch an Eclipse application". You should get this. | ||
| + | [[Image:rcp-menu-13.png|left|thumb]]<br style="clear:left;" /> | ||
| + | * Congratulations. You're Done! | ||
Latest revision as of 09:54, 3 March 2011
Add Menu to RCP Application
In this example I'll be adding a menu to an RCP application checked out from Simple Sample from RCP Course Repository
- Start Eclipse and check out the example from our course's SVN repository.
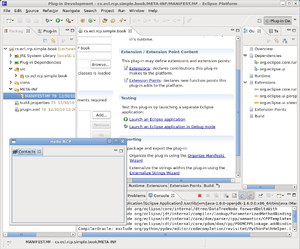
- Run the example and you should get something like this:
- We'll now create a command (Exit) which we will later add to the menu (File) that we have yet to create.
- Start by double clicking plugin.xml in the Package window. This will bring the plugin.xml file into the edit window.
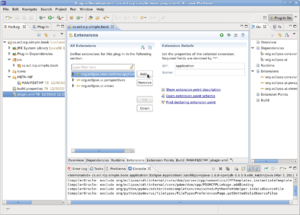
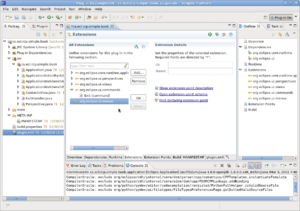
- Now click on the Extensions tab. You should see this:
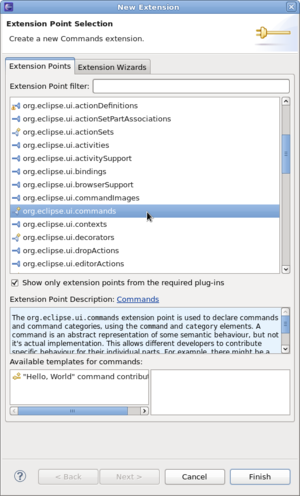
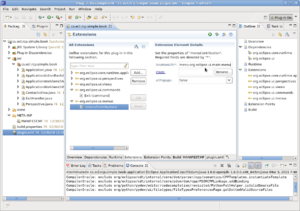
- Click the Add button and select "org.eclipse.ui.commands" and click Finish.
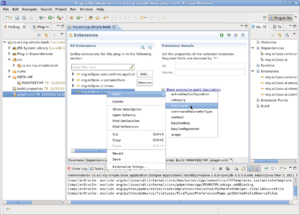
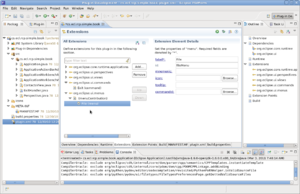
- Right click on the ui.commands extension you just added and select New -> Command.
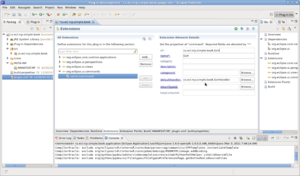
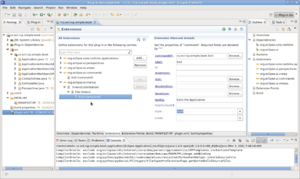
- Enter the id, name and defaultHandler as shown. i.e. id is cs.ecl.rcp.simple.book.Exit, name is Exit and defaultHandler is cs.ecl.rcp.simple.book.ExitHandler.
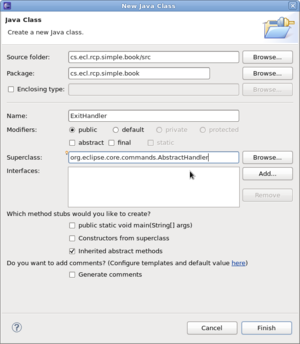
- Click on the hyperlink "defaultHandler" to create the class which should extend "org.eclipse.core.commands.AbstractHandler". Remove any interfaces. You should have something like this.
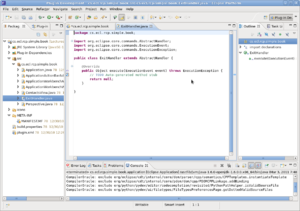
- Click Finish. You should now have this.
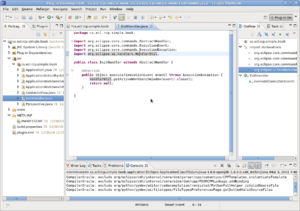
- Modify the class so it now looks like this.
- Ok, we've created a command, so now we need a menu in which to add it.
- Go back to the plugin.xml view and click the Add button. Then select the "org.eclipse.ui.menus" extension and click Finish.
- Now, right click on the menus extension and select New -> MenuContribution. Then add the location URI as "menu:org.eclipse.ui.main.menu". You'll get something like this.
- Right click on menuContribution and select New -> Menu. Add a menu with the label "File" and the id "fileMenu".
- Right click on File(menu) and select New -> command. Then set the commandid, label and tooltip to "cs.ecl.rcp.simple.book.Exit", "Exit" and "Exits the Application".
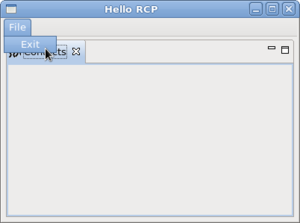
- Save your work and then go back to the Overview tab and click on "Launch an Eclipse application". You should get this.
- Congratulations. You're Done!
