Difference between revisions of "Team1/Creating your first Java project"
(→Creating your first Java project) |
|||
| Line 20: | Line 20: | ||
<br/>1.6. Specify the name and check ''"public static voin main"'' in the ''method stubs'' section.<br /> | <br/>1.6. Specify the name and check ''"public static voin main"'' in the ''method stubs'' section.<br /> | ||
[[Image: Java_Class2.jpg | 600px]] | [[Image: Java_Class2.jpg | 600px]] | ||
| + | |||
| + | <br/>1.7. Modify the main method:<br/> | ||
| + | <pre>public static void main(String[] args) { | ||
| + | System.out.println("This is my first class"); | ||
| + | |||
| + | }</pre> | ||
Revision as of 09:05, 25 January 2011
Creating your first Java project
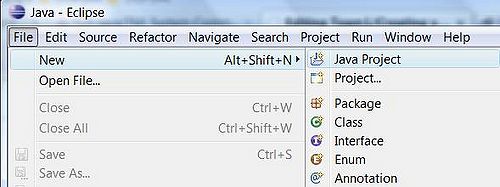
1.1. Select from the Menu: File -> New -> Java Project

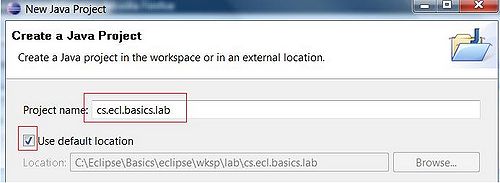
1.2. In the Create the Java Project window specify the project name (follow the Java convention) and leave "Use default location" checked. Press Finish to create the project

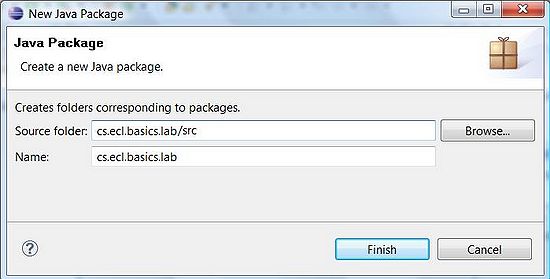
1.3. Now create a package. Select folder src, right click on it and select New -> Packege

1.4. Specify the package name (Java convention is to use the same name as project). Press Finish

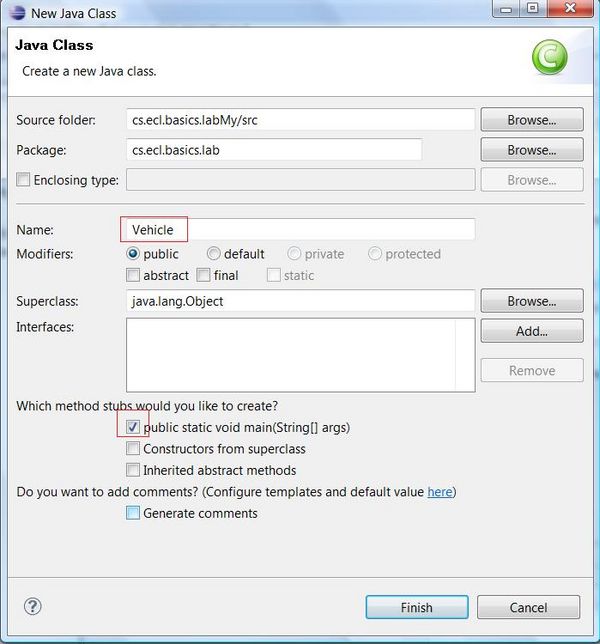
1.5. Create Java class. Right click on the newly created package and select New -> Class

1.6. Specify the name and check "public static voin main" in the method stubs section.

1.7. Modify the main method:
public static void main(String[] args) {
        System.out.println("This is my first class");

    }