Difference between revisions of "Basics : Install Eclipse Plugins"
| (One intermediate revision by the same user not shown) | |||
| Line 6: | Line 6: | ||
Set the env variable JAVA_HOME to ''{your installation directory}'' | Set the env variable JAVA_HOME to ''{your installation directory}'' | ||
{{Ecl_installation|type=Basics|type-small=basics|name=Eclipse IDE for Java Developers|install=Follow [http://www.vogella.de/articles/Eclipse/article.html#firstjava this tutorial to create the first application]}} | {{Ecl_installation|type=Basics|type-small=basics|name=Eclipse IDE for Java Developers|install=Follow [http://www.vogella.de/articles/Eclipse/article.html#firstjava this tutorial to create the first application]}} | ||
| − | |||
| − | |||
| − | |||
| − | |||
Latest revision as of 22:00, 12 January 2011
Main Page · Course Description · Course Topics · Schedule, Students, Teams · Course Resources · Course Projects
Install Java SE Development Kit
If one does not have Java installed, then the Java SE (JDK) must be installed:
- Go to Java SE Downloads and click on Download JDK and follow the instructions. (attention at your operating system)
Set the env variable JAVA_HOME to {your installation directory}
Install Eclipse Basics
- Go to Eclipse Downloads and choose Eclipse IDE for Java Developers (attention at operating system 32/64 bit).
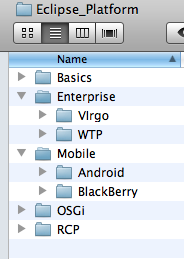
- Unzip the downloaded file in /Eclipse_Platform/Basics directory.
- Start Eclipse (click the eclipse executable file in /Eclipse_Platform/Basics/eclipse directory
- In the dialog box:Workspace Launcher -> Workspace type: ./wskp/{app-type} where {app-type} could be: hello or simple or lab
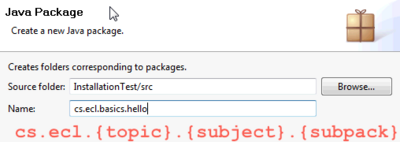
Follow this tutorial to create the first application
For this course you will be using the workspace defined in /Eclipse_Platform/Basics/eclipse/wksp/...
|
The root directory for this course is: Eclipse_Platform
|
where:
|
Check your working environment by running the Hello Sample from Course Repository
You may also want to install JUnit Library to be able to debug your applications.
To install JUnit follow the instructions:
- Download JUnit4.x.jar from the JUnit website . The download contains a "junit-4.*.jar" which is the JUnit library.
- To make JUnit available in your Java project you have to add the the JUnit library file to your Java classpath. (If you do not know how to do it, please use this Eclipse tutorial to learn how to add jar files to your Eclipse project).

