Difference between revisions of "Tutorial 7 - Installing Linux / Live Linux / Virtualization"
(→Main Objectives of this Practice Tutorial) |
(→INVESTIGATION 2: CREATING A VIRTUAL MACHINE IN VMWARE AND INSTALLING RED HAT ENTERPRISE LINUX) |
||
| Line 134: | Line 134: | ||
= INVESTIGATION 2: CREATING A VIRTUAL MACHINE IN VMWARE AND INSTALLING RED HAT ENTERPRISE LINUX = | = INVESTIGATION 2: CREATING A VIRTUAL MACHINE IN VMWARE AND INSTALLING RED HAT ENTERPRISE LINUX = | ||
<span style="color:red;">'''ATTENTION''':You should already have VMWare Workstation installed from OSM620. If you do not, refer to OSM640 wk1 PreLab.</span> | <span style="color:red;">'''ATTENTION''':You should already have VMWare Workstation installed from OSM620. If you do not, refer to OSM640 wk1 PreLab.</span> | ||
| − | In this investigation you will be creating a new virtual machine in VMWare Workstation and installing Red Hat Enterprise Linux | + | In this investigation you will be creating a new virtual machine in VMWare Workstation and installing Red Hat Enterprise Linux 9. Keep this virtual machine (VM) after completing Tutorial 7 as you will require it for your Project. |
* Launch VMware Workstation, and select '''Create a New Virtual Machine'''. | * Launch VMware Workstation, and select '''Create a New Virtual Machine'''. | ||
Revision as of 09:27, 26 January 2023
Contents
- 1 INSTALLING LINUX / LIVE LINUX / VIRTUALIZATION
- 2 KEY CONCEPTS
- 3 INVESTIGATION 1: CREATING A RED HAT ACCOUNT AND DOWNLOADING THE ISO
- 4 INVESTIGATION 2: CREATING A VIRTUAL MACHINE IN VMWARE AND INSTALLING RED HAT ENTERPRISE LINUX
- 5 INVESTIGATION 3: INSTALLING THE GLOBAL PROTECT VPN AND CONNECTING TO MATRIX FROM YOUR VIRTUAL MACHINE
- 6 LINUX PRACTICE QUESTIONS
INSTALLING LINUX / LIVE LINUX / VIRTUALIZATION
Main Objectives of this Tutorial
- Download and install the VirtualBox VM software application
- Download and install Red Hat Enterprise Linux (RHEL) in a virtual machine
- Open a terminal and connect to your Matrix account via the ssh utility
- Run several open-source applications in your graphical RHEL environment
Tutorial Reference Material
| Course Notes |
Concepts / Resources | ||
| Course Notes: | Installing Linux
|
Red Hat Resources | |
KEY CONCEPTS
Installing Linux
Having a Linux system on your home computer provides access to a large selection of open source software.
Installing your own version of Linux on your notebook or desktop computer also can make it easier to practice working
in the Linux environment and learn how to perform routine Linux OS administration tasks.
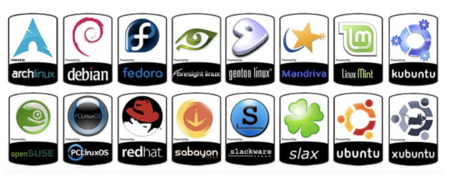
A Linux distribution (often abbreviated as distro) is an operating system made from a software collection that is based upon the Linux kernel and, often, a package management system. Linux users usually obtain their operating system by downloading one of the Linux distributions, which are available for a wide variety of systems...
Reference: https://en.wikipedia.org/wiki/Linux_distribution
Steps in the Linux Installation Process:
- Select a Linux Distribution to download (ISO image file or VM file).
- Create VM and install Linux Distribution or run VM file.
Linux Installation Methods
Standalone Installation
- Linux is the only OS on the computer.
- Any existing data on your hard disk will be erased.
(Image licensed under cc)
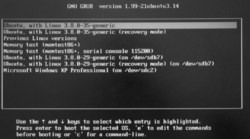
Dual-boot / Multi-boot Installation
- A boot menu allows the user to select the desired OS.
- Advantages of Dual-Boot or Multi-Boot:
- This option provides a method to access your computer if one OS fails to boot-up.
- Access the Windows partition if your Windows OS cannot boot-up.
- This booting method is great for troubleshooting
(for example: boot into Linux OS to eliminate a hardware issue).
- Installation Tips:
- It is recommended to back up important data before proceeding.
- It is recommended to install the Linux OS last, as other operating systems may not offer a multi-boot option.
Virtual Machine Installation
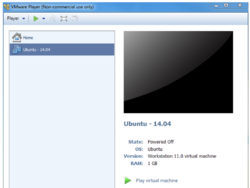
- Virtualization is the process of running a virtual instance of a computer system in a layer abstracted from the actual hardware. Reference: https://opensource.com/resources/virtualization
- The virtualized OS is installed and run in a window under another OS. Special software is used to manage the entire process, referred to as the hypervisor.
- Advantages of Virtualization:
- You can run VM from an ISO image file or a VM file.
- One or more virtual machines can be run at the same time.
- The guest OS shares hardware with the host OS and possibly other virtualized systems.
- The guest systems have network access through the host.
- Installation Tips:
- Virtualization requires a compatible processor: not all processors support that feature.
- Your BIOS should be set to enable Virtualization.
- Popular VM software for Windows, Apple and Linux OS include:
- VMware
- Oracle Virtual Box
Live Linux CD
A live CD (also live DVD, live disc, or live operating system) is a complete bootable computer installation including operating system which runs directly from a CD-ROM or similar storage device into a computer's memory, rather than loading from a hard disk drive. A Live CD allows users to run an operating system for any purpose without installing it or making any changes to the computer's configuration. You can also create a Live USB, which depending on the configuration and USB size may also allow saving data back to the USB (unlike a Live CD/DVD).
Reference: https://en.wikipedia.org/wiki/Live_CD
INVESTIGATION 1: CREATING A RED HAT ACCOUNT AND DOWNLOADING THE ISO
ATTENTION: The due date for successfully completing this tutorial (i.e. tutorial 7) is by Friday, April 21 @ 11:59 PM (Week 14).
In this investigation, you will first create a Red Hat account and download the install medium (ISO). This is required to install Red Hat as a virtual machine in INVESTIGATION 2. Be sure to remember your login and password.
- Navigate to Red Hat's website (click on the link).
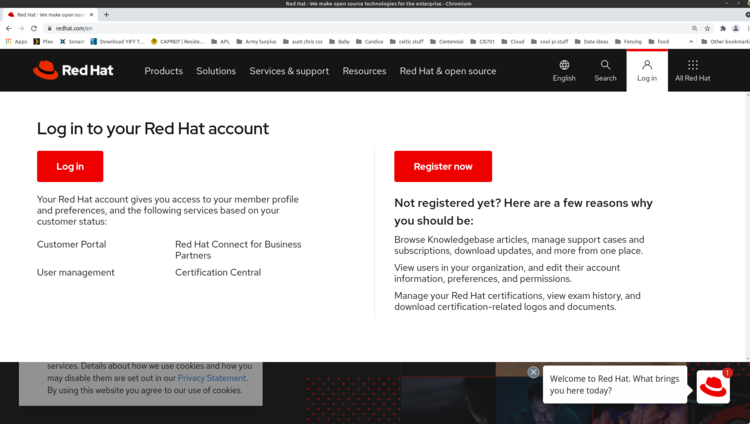
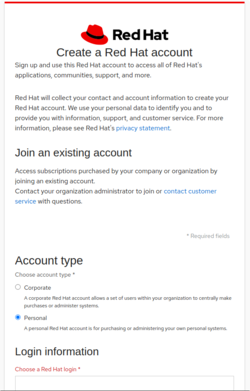
- On the top right side, click Login and select Register Now. You should see the following screen.
- Select Personal as your account type and fill in your information. You may choose your own Red Hat login. When you are done click CREATE MY ACCOUNT.
- Note: You may wish to use a personal email in creating your account so you always have access to it.
- You may need this account for future courses.
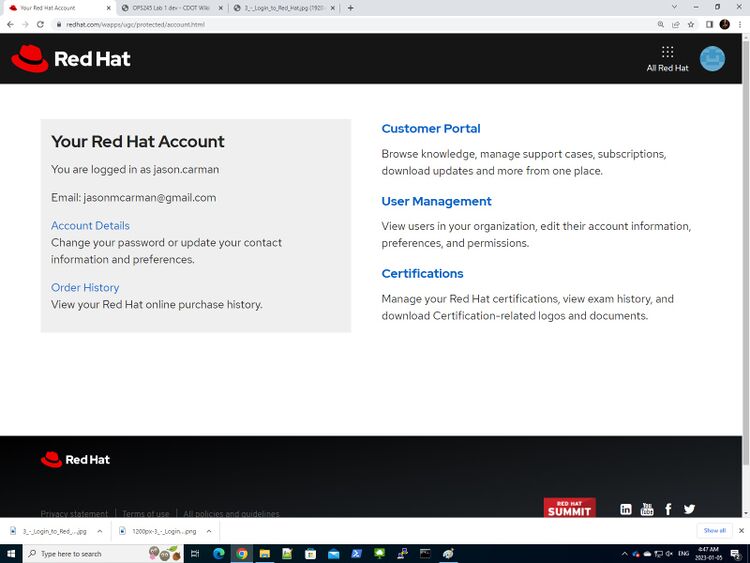
- Login to the email account you used to sign up with and confirm it. You should see the following screen (for your account).
- Go to the Red Hat Developers Portal. Login with your new account and accept all terms and conditions.
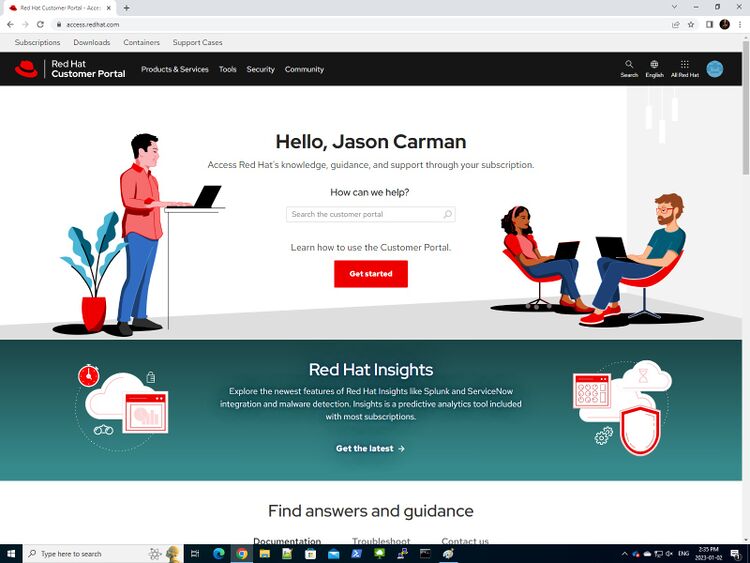
- Go back to the Red Hat website, login and click on Customer Portal. You should see the following screen.
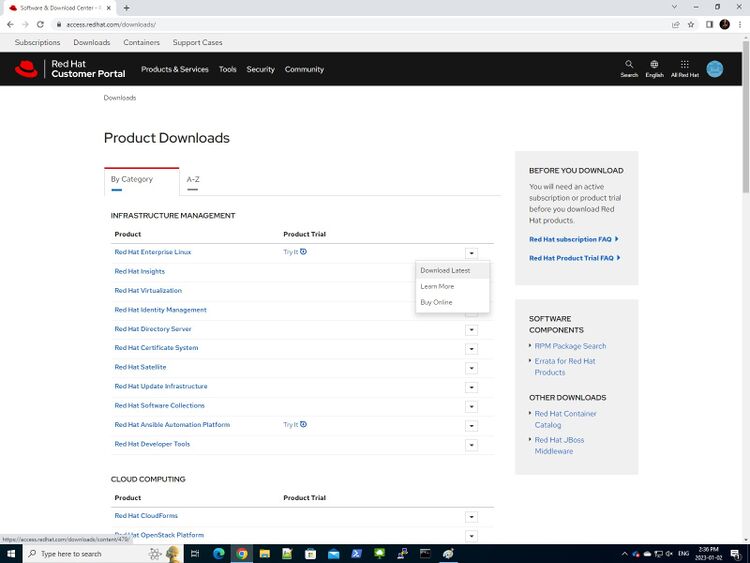
- Scroll down until you see Download Software. Click Download software. You should see the following screen.
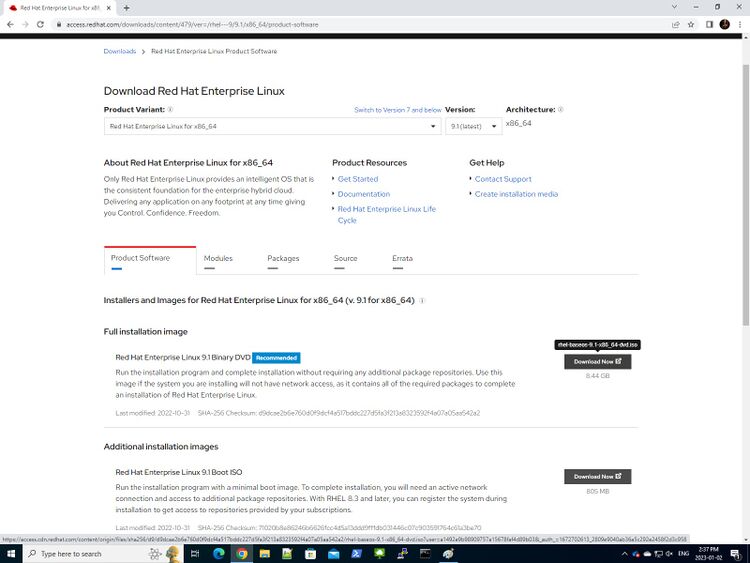
- Click the arrow (highlighted in the previous screenshot) beside "Red Hat Enterprise Linux". Then select Download latest. It will take you to a download page (depicted below). Find the Full installation image. It should be labelled "Red Hat Enterprise 9.1 Binary DVD". Click "Download Now". See the below screenshot for reference. Note: Downloading may take some time depending on the speed of your Internet connection.
- Once your ISO has finished downloading you may proceed to Investigation 2.
INVESTIGATION 2: CREATING A VIRTUAL MACHINE IN VMWARE AND INSTALLING RED HAT ENTERPRISE LINUX
ATTENTION:You should already have VMWare Workstation installed from OSM620. If you do not, refer to OSM640 wk1 PreLab. In this investigation you will be creating a new virtual machine in VMWare Workstation and installing Red Hat Enterprise Linux 9. Keep this virtual machine (VM) after completing Tutorial 7 as you will require it for your Project.
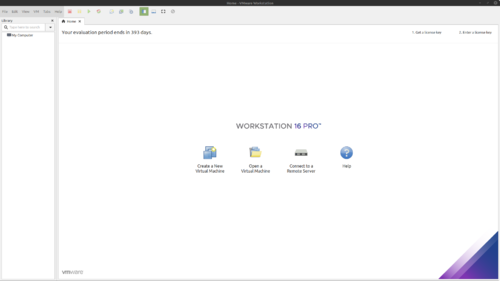
- Launch VMware Workstation, and select Create a New Virtual Machine.
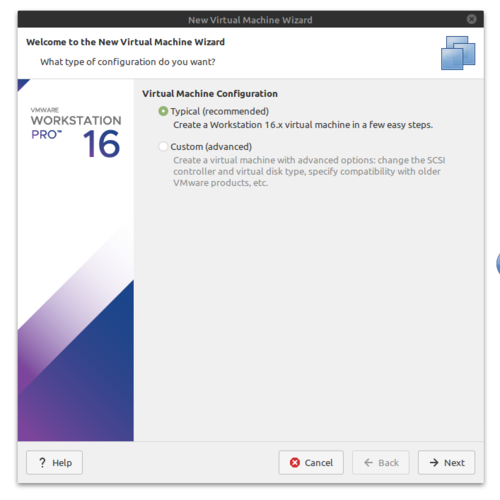
- Select Typical (recommended) and click next.
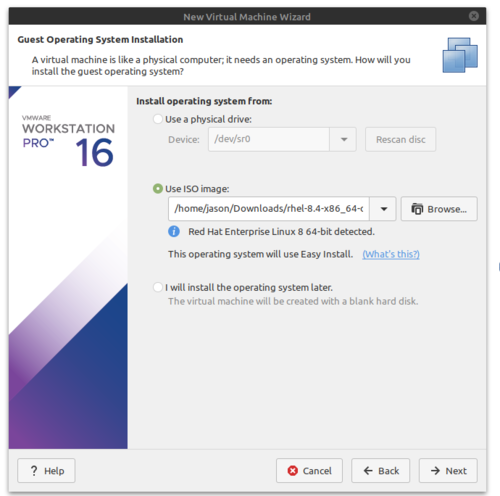
- Select Use ISO image and browse to the Red Hat ISO you downloaded in INVESTIGATION 1. Click next.
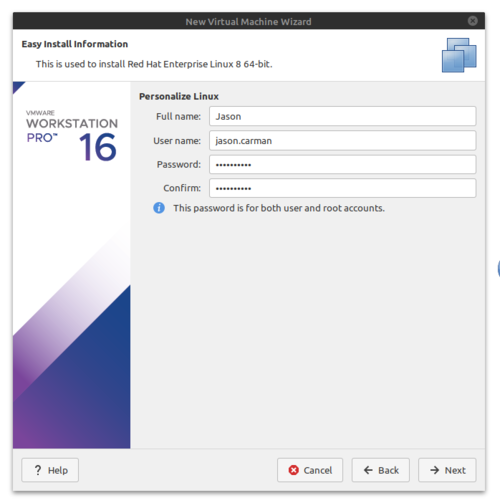
- Enter your Seneca ID for user name, and the password P@ssW0rd, then click Next.
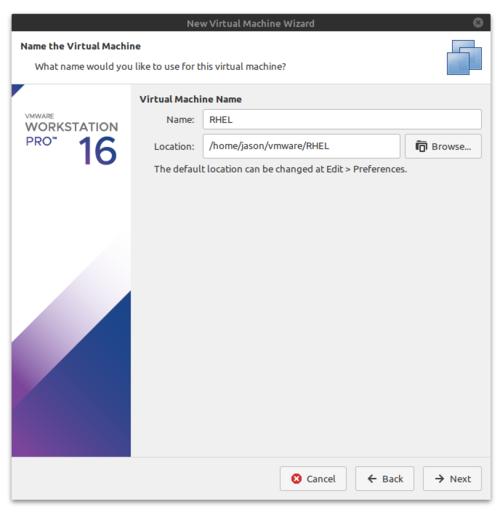
- Set the name to RHEL (this is a common acronym for Red Hat Enterprise Linux), accept the default location and click Next.
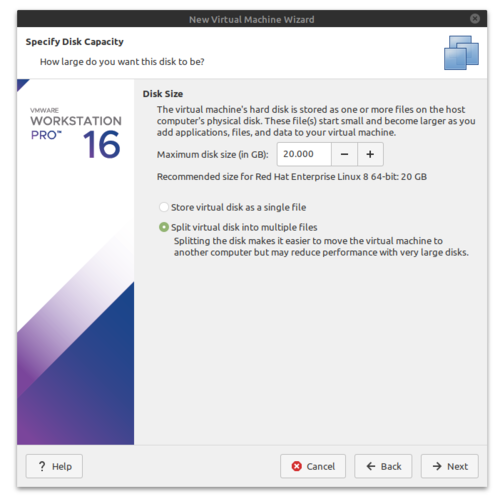
- Accept the defaults and click Next.
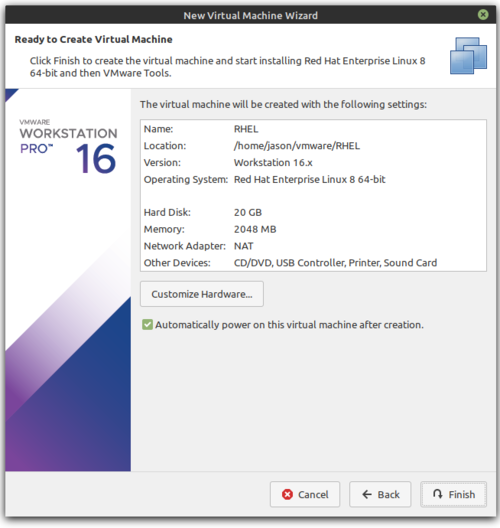
- You should see the following screen. If everything looks correct, click Finish. Note: Your VM will begin installing RHEL once it boots up. This may take a while. When the install finishes, it will reboot.
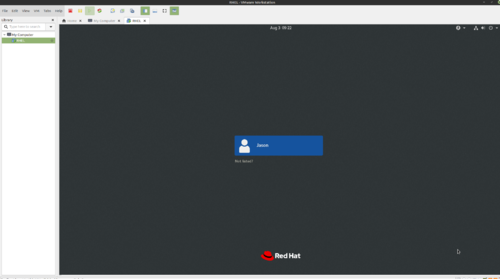
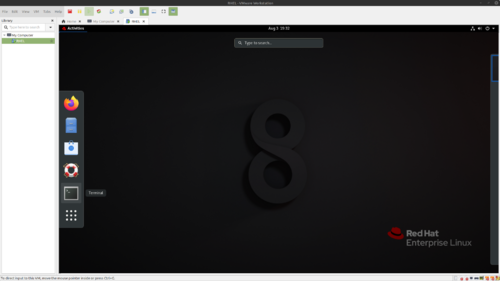
- Once your VM has rebooted, you should see a login screen similar to the following.
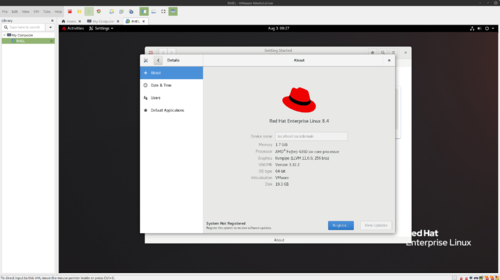
- Login to your RedHat Virtual Machine. You will immediately be prompted to register your system, as shown below.
- Click Register...
- Leave the defaults and login with the Red Hat Account you created in Investigation 1.
- Your system should now show as a Registered System at the bottom of the window.
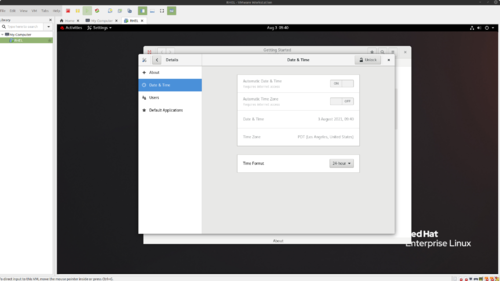
- Click Date & Time. You should see the following screen.
- Click Unlock and login with your Administrator password (it should be P@ssW0rd).
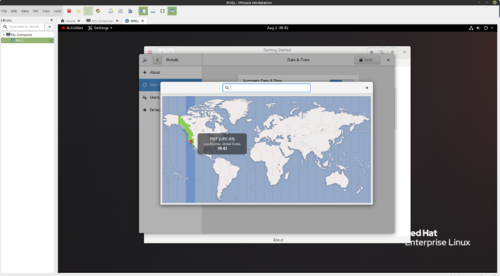
- Click on the Time Zone.
- In the Search Box type Toronto. Accept the auto complete and click the x on the window.
- Close the window by clicking the x in the corner.
- The Getting Started window offers help on performing common tasks. Feel free to look around and familiarise yourself with these. When you are done, close the window by clicking the x in the corner.
- Leave your VM powered on and proceed to Investigation 3.
INVESTIGATION 3: INSTALLING THE GLOBAL PROTECT VPN AND CONNECTING TO MATRIX FROM YOUR VIRTUAL MACHINE
Installing software in Linux requires both an active Internet connection and knowledge of which package management tool to use for your distribution (or distro). Linux software and updates come from special sources hosted on other servers, known as repositories (or repos). All the major Linux distros host their own repos, though anyone can host a repository for a distribution - and many organizations do. Due to the Open Source nature of Linux, certain repos may contain specialized software that is not available in the main repository (such as EPEL - Extra Packages for Enterprise Linux); or they may contain a mirror of the main repo.
Accessing these and installing software requires using your Linux distro's command line package management tool. The major ones you will encounter when you use Linux are:
- DNF (Dandified Yum) - Which is an update of YUM (Yellowdog Updater, Modified). Both of these operate as a front end for RPM (Red Hat Package Manager). These are used in Red Hat based Linux distros, such as Red Hat Enterprise Linux and Fedora. The advantages of DNF and YUM over RPM is that they resolve dependencies (meaning if the software you are installing requires other software, they will install that as well). RPM does not do this, which can lead to a term known in industry as dependency hell.
- APT or APT-GET (Aptitude Package Manager). This is used in Debian based Linux distributions such as Linux Mint, Ubuntu and Kali Linux.
- Pacman (Pacman Package Manager). This is used in Arch Linux, as well as a few others.
- Zypper Package Manager. This is used in OpenSUSE, which is popular for use on servers in Europe.
Since we are using Red Hat Enterprise Linux (or RHEL), we will be using DNF to install software.
Your first step to installing software should always be to test your Internet connectivity, as without a working connection you cannot resolve anything. To do this we can use the tool ping, which is commonly used to troubleshoot network connectivity issues.
- Click on Activities in the top left corner of your RHEL VM (right next to the tiny Red Hat) and launch the Terminal application.
- Enter the command ping www.google.com
- This should succeed. If it fails, you may need to troubleshoot network issues. Ask your professor for assistance. Press ctrl + c at the same time to kill this process.
- While you can switch to the root user in your VM and install software, it's a bad practice to do this. In industry, admins are commonly granted permissions through sudo; which stands for "superuser do". This is similar to run as administrator in Windows. Sudo can be configured to allow users elevated privileges to a subset of commands, or all commands. Additionally, usage is logged to the appropriate user. This makes tracking the activity of a system with many administrators a lot easier. When you initially installed RHEL, you did not set up sudo. We will do so now.
- Initially you will have to switch to root to configure sudo. Do this by issuing the command su -
- You should see your prompt change to [root@localhost ~]#. Now issue the command visudo
- This will allow you to edit the /etc/sudoers file and add the user you created when you installed RHEL. visudo works like using vi, except it checks the file to ensure the syntax is correct. If it is not, it will give you a warning. This is an extremely useful tool. Find the line that reads as follows:
root ALL=(ALL) ALL
- This means that root is allowed to run from any terminal (first all), acting as any user (second all), and execute any command (third all). Below this line, add the following (substituting your username where appropriate). Be sure to enter insert mode by pressing the letter i:
senecaid ALL=ALL
- When you are done, press esc followed by :x to save your changes. This should return you to your command prompt. We want to test our elevated privileges from our regular user, so return to your normal prompt by typing exit
- Now we are going to update our operating system. To do this, issue the command sudo dnf -y update
- You may be prompted for your password. The inclusion of the -y option, auto assumes yes to prompts (this can be very handy). The update process may take a while. Do not interrupt it.
- The package required to connect to Seneca's VPN (openconnect) is not available in the default RHEL repo. It is however, available from epel (extra packages for enterprise linux). First add this repo by issuing the command sudo dnf install https://dl.fedoraproject.org/pub/epel/epel-release-latest-8.noarch.rpm
- Note, since you did not include the -y option, you will have to answer y (yes) when prompted.
- Now, install openconnect by issuing the command sudo dnf -y install openconnect
- Once this has completed, you can connect to Seneca's VPN by issuing the following command (be sure to substitute your username where appropriate) sudo openconnect --protocol=gp studentvpn.senecacollege.ca -u username -b
- Enter your password when prompted.
- Now you should be able to ssh into Matrix. Test this by issuing the following Linux command ssh yoursenecaid@matrix.senecacollege.ca
- Enter yes to share your public key.
- When prompted, enter your password. Were you able to connect to your Matrix account?
- Confirm you are in your home directory. What command did you use?
- Use a text editor (nano or vi) to create a file in your current directory called myvm.txt and enter the following text:
This is line 1
This is line 2
This is line 3
- Save and exit the text editor.
- Confirm that you created this file, and confirm the contents are correct.
- Enter the command: ~osl640/week7-check-1 to submit your tutorial.
- Once this succeeds, you may exit and shutdown your vm. note: you can shutdown from the command line by issuing the command: poweroff.
Important: Keep your RHEL VM, as you will need it for your project.
LINUX PRACTICE QUESTIONS
The purpose of this section is to obtain extra practice to help with quizzes.
Here is a link to the MS Word Document of ALL of the questions displayed below but with extra room to answer on the document to simulate a quiz:
Your instructor may take-up these questions during class. It is up to the student to attend classes in order to obtain the answers to the following questions. Your instructor will NOT provide these answers in any other form (eg. e-mail, etc).
Review Questions:
- Define the term Linux Distribution.
- List and explain two advantages of installing a Linux distribution on your home computer or laptop as either the host operating system or as a virtual machine.
- List and explain two things to consider prior to installing a Linux distribution on your home computer.
- Explain why installing Multi-boot for Linux is useful for computer troubleshooting.
- Define the term Virtualization.
- List the steps to install software or update your RHEL system.
- List 4 applications that are contained in the Red Hat Enterprise Linux distribution.
- Explain the difference between a Live Linux distribution and an installed Linux distribution.
- Define the term 'repo. What are repos (repositories) used for? What one did you add to your VM?
- What is sudo?
