Difference between revisions of "GPU610/DPS915 Team 7 Project Page"
(→Team Members) |
(→Creating ray-traced images by Alek Minassian) |
||
| Line 50: | Line 50: | ||
[[File:AM_Profile.PNG]] | [[File:AM_Profile.PNG]] | ||
| + | The results of the profiling done on Matrix can be found in this [[Media:AM raytrace.flt.txt | flat profile]] and this [[Media:AM raytrace.clg.txt | call graph]]. | ||
The following shows some timings reported by code that was added to the application. | The following shows some timings reported by code that was added to the application. | ||
Revision as of 21:21, 18 February 2018
GPU610/DPS915 | Student List | Group and Project Index | Student Resources | Glossary
Contents
Project Name Goes here
Team Members
Assignment 1
Creating ray-traced images by Alek Minassian
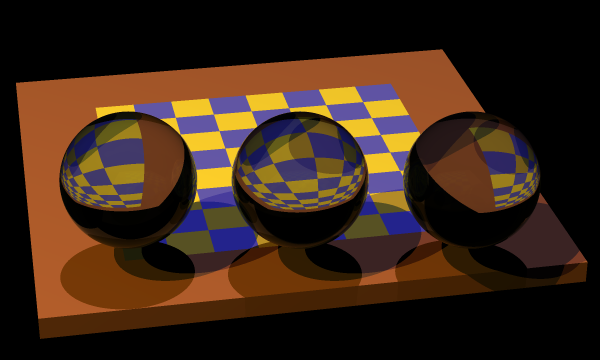
This is an open-source program available from here. This program can be built and run on both Windows and Linux. A copy of the source code in ZIP format is available in the section below as well as instructions for building and running. The program works by creating one or more objects and placing them on a "Scene". It then adds one or more light sources and traces them as they reflect off or refract through objects. As an example, the following chessboard is generated as follows:
- A chessboard is created, rotated, and added to the scene.
- Three spheres are created and added to the scene.
- Three light sources are added.
- Finally, the new image is saved.
Downloading the source code
A modified version of the project is available from here. The following modifications were made:
- The raytrace/raytrace/build file used for building on Linux is modified to enable profiling as well as using version 7.2.0 of g++ on Matrix.
- The Visual Studio solution raytrace/raytrace.sln is upgraded to Visual Studio 2017.
- Some code has been added to scene.cpp in order to report the time spent in certain parts of the code. This is so that we can get a more granular timing than what is available through profiling.
Building and running on Windows
- Unzip the source from the previous step and open raytrace/raytrace.sln.
- Set the active configuration and platform:
- From the "Build" menu item, select "Configuration Manager..."
- Change the Active solution platform to be x64.
- Change the Active solution configuration to be Release.
- If you run into build issues, you may have to re-target the solution as follows:
- In the Solution Explorer pane, right-click on the solution and select "Retarget solution".
- Select the latest Windows SDK version available to you.
- You can now build the solution from the build menu.
- Run the program by selecting "Start Without Debugging" from the Debug menu. You should now see the following screen:
- The chessboard image chessboard.png, that was displayed above, is now generated and can be found in the raytrace/raytrace folder.
Building and running on Linux (Matrix)
- Download the source: curl https://wiki.cdot.senecacollege.ca/w/imgs/Raytrace.a1.zip -o rtsource.zip
- Unzip the source: unzip rtsource.zip
- cd raytrace/raytrace
- chmod a+x build
- Build the source code: ./build
- Run the application: ./raytrace chessboard
Profiling and Analysis
The following shows the results of profiling in Visual Studio:
The results of the profiling done on Matrix can be found in this flat profile and this call graph.
The following shows some timings reported by code that was added to the application.
Analysis of the code shows that main calls ChessBoardTest which calls SaveImage. Based on the profiling results above, the application spends the majority of its time in SaveImage. Analyzing the code also shows that SaveImage calls TraceRay in a nested loop as follows:
        for (size_t i=0; i < largePixelsWide; ++i)
        {
            ......

            for (size_t j=0; j < largePixelsHigh; ++j)
            {
                ......
                TraceRay();
                ......
            }
        }
The remainder of the functions where the majority of the time is spent are called from TraceRay. The timing statements added to the code show that 3261 milliseconds are spent in this nested loop. The total time spent in the application is 3658 milliseconds. Therefore, we can conclude that the majority of the time is spent in the above nested loop.

