Difference between revisions of "Lab 5 Warnings / Debrief"
| Line 28: | Line 28: | ||
== Any Simple Comparisons for LVM !?! == | == Any Simple Comparisons for LVM !?! == | ||
| + | [[Image:lvma.png|thumb|right|800px|'''LVM''' ('''Logical Volume Manager''') is a program to manage file system size in an efficient manner. If this diagram was displayed vertically as opposed to horizontally, you could visualize building a large cake with many layers!]] | ||
'''Certainly... Think of Using LVM like "building a cake":''' | '''Certainly... Think of Using LVM like "building a cake":''' | ||
| − | |||
| − | |||
Revision as of 08:40, 8 July 2015
Contents
Purpose of Lab 5
What is LVM?
Monitoring and ensuring adequate space for a Linux file-system is considered to be a critical task for any system administrator. An application called LVM is a very useful tool for Linux system administrators to easily manage file systems - even when the computer system is running!
LVM (Logical Volume Management) is used to manage hard disk drives / partitions for Linux and Unix systems. LVM provides more flexibility than just partitioning hard disks. Volume Groups are areas used to define Physical Volumes (i.e. hard disks, disk partitions, or other forms of storage devices). Logical Volumes are then used to relate directories (mount points) to a specific physical volume or for a "range" or "span" of physical volumes.
LVM allows more flexibility and growth potential for Linux systems (for example, having Logical volumes span multiple hard disks). CentOS uses LVM by default upon installation. Other Linux distributions may provide the capacity to install LVM,
LVM Tools
- There are a choice for managing LVM: Graphically or via Command-Line.
- A graphic program is called: system-config-lvm. This graphical application is useful, but may be deprecated (i.e. "being phased out").
- There are various commands to manage LVM (some include):
- lvextend
- lvcreate
- lvreduce
- pvcreate
- vgextend
- There are also commands to obtain LVM information:
- vgs
- pvs
- lvs
Any Simple Comparisons for LVM !?!
Certainly... Think of Using LVM like "building a cake":
- A cake needs to rest on a platter.
- In our case the platter is known as a volume group. One default volume group is automatically created if you enable LVM when installing a Linux OS. In this way we can support different volumes groups for different purposes (eg. accounting dept, IT, management, etc) just like different platters would hold different types of cakes for the party!
- Just one thing: We can grow our space between other partitions in various volume groups (or platters).
Need a Bigger Cake? Add More Layers!
- We can grow a larger cake by adding more layers.
- In our case, we add layers by defining and adding physical Volumes to our Volume Group.
- Some think of physical volumes as partitions.
- When you want to make a bigger cake, add more layers (in our case, add more physical volumes to volume group
- The partitions should be created and formatted (fdisk, mkfs), then can be added as physical volumes to the volume group (pvcreate)
Logical Volumes are like the "Hungry Guests" at the Party (a.k.a the "cake inhalers")
- As hungry guests sample some can and want more, they can grab more layers of cake.
- In fact, they can also grab pieces from different cakes (i.e. from different platters or Volume Groups).
- A Logical Volume is simply a directory (mount-point) that is associated to a physical Volume or a group of physical volumes
- In our case, if we want more file size, simply create and format a partition, add it to the volume group, and then extend logical volume (lvextend) so that directory or file system can grow.
- If we want to reduce size of logical volume, we can use the lvreduce command.
- There used to be problems if you reduced the logical volume size smaller than its unused capacity, but using the -r option prevents this from occurring.
- We can do these type of LVM operations without having to reboot the machine!
- You will also learn to simulate adding new hard disks by creating a virtual hard drive, partition & format new drive, add physical volume to volume group (pvcreate, vgextend) and extend the logical volume.
Additional File System Maintenance
Mounting and Un-Mounting File-Systems
We take for granted that a file-system must be mounted (for example the root partition) in order for a Linux system to be usable upon system start-up. We need to learn now to do this manually by editing or adding an entry in the /etc/fstab file. The /etc/fstab (file system table) contains entries to mount various file systems automatically upon start-up of the Linux system.
The Linux system administrator also has the ability to manually mount (connect) and un-mount (disconnect) partitions in order to perform maintenance on the file system (for example un-mounting the /home partition to install software and prevent users from logging in during that process). Those command are called: mount and umount (that is NOT a typo)!
Monitoring File System Space
Another essential duty of a Linux system administrator is to anticipate problems and take preventative measures to avoid computer system problems before that occur.
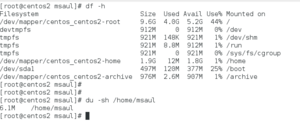
Monitoring disk space activity helps provide Linux system administrators information to help take corrective action before problems can occur. The df and du commands are simply yet useful commands to help a Linux system administrator analyze and take corrective action to fix low disk space issues.
If we need more space, then we can use LVM to help us out!
Scheduling Routine Tasks (Crontab)
Cron Tables (crontabs) allow the Linux System Administrator to run useful shell scripts or shell script that we have created at specific dates/times. It would be silly to expect a system administrator to stay up late (eg. 2 a.m.) to manually run a shell script to terminate processes or to re-boot Linux servers. Database files (tables) are used to provide instructions on how frequent shell scripts or commands can be run. The cron daemon is used to refer to these files and to run them on a pre-determined basis. The term cron comes from the old word chronograph meaning a special type of watch (actually a stop-watch) to help monitor and schedule routine tasks.
Scheduling commands, shell scripts, or other programs to be run are contained in a file called: /etc/crontab. This file stores the list of jobs to do that are run on a particular schedule. This file cannot be edited manually via a text editor. Instead, the crontab utility is used to create, edit and remove that file. Here some ways to use the crontab utility:
Crontab utility is very easy to use.
crontab -e (creates or edits crontab file) crontab -u username -e (for specified user) crontab -l (lists current crontab file) crontab -r (remove crontab file)
Here is the typical field layout for a crontab entry (or multiple entries):
.---------------- minute (0 - 59)
|  .------------- hour (0 - 23)
|  |  .---------- day of month (1 - 31)
|  |  |  .------- month (1 - 12) (or jan,feb,mar,apr ...)
|  |  |  |  .---- day of week (0 - 6) (Sunday=0 or 7)
|  |  |  |  |                 (or sun,mon,tue,wed,thu,fri,sat)
|  |  |  |  |
*  *  *  *  *  command to be executed
The asterisk (*) indicate to run for that unit of time. Below is an example of crontab entries:
# Check every minute for logins by user “evil”
'''*  *  *  *  *  who | grep '^evil''''
#
# Run a script called "ascript.bash" every odd hour (1,3 5...) during the week
'''0 1,3,5,7,9,11,13,15,17,19,21,23 * * 1-5 /home/bob/ascript.bash'''
# Run "ascript.bash" every half hour during the week
'''0 */2 * * 1-5 /home/bob/ascript'''
# Same... just doing it a different way
'''0 */2 * * mon,tue,wed,thu,fri /home/bob/ascript'''
You will learn in the lab how to create and use the crontab utility to run a shell script automatically and periodically that will send an e-mail warning to the system administrator if disk space capacity has reached a level for immediate resolution.
Common Mistakes / Warnings
- Not following instructions
- Not constantly issuing commands to verify previous command were properly executed
Preparing for Lab Sign-Off
In order to properly complete your lab and move to the next lab, you must have your instructor "sign-off" on your lab
- Each "signed-off" lab (before due date) is worth 1% of your final grade.
- Signing-off on labs help to spot errors that can cause problems with future labs.
- Do you ask the instructor what to check for! Read at the bottom of the lab the requirements, and have all proof available for instructor to view at same time.
- Failing to be prepared and asking instructor what to check when assignment is mark will result in deduct of marks!
- For example, open multiple terminals with command results. If properly set-up ahead of sign-off, the process should only take instructor approx 20 seconds to sign-off your lab.
- If you do not have your lab-logbook, you MUST show your work and your lab log-book to your instructor for sign-off in the next class. This may cause a late penalty if past the required due date.
Lab 5 Debrief
Preparing for the Quizzes
- What is a VG? PV? LV?
- What is the total size of the "main" VG on your system?
- How do you create a LV?
- How do you delete an LV?
- How would you add the disk partition /dev/sdb7 to your volume group "main"?
- How would you increase the size of the root filesystem by 50 MB?
- How can you determine if a partition has been mounted onto a system?
- How can you unmount an existing partition from the file-system?
- How can you temporarily mount a partition on a file-system?
- How can you permanently mount a partition on a file-system upon boot-up?
- What are the separate elements (fields) of the /etc/fstab file?
- Describe the tools that a Linux system administrator have to monitor disk space usage.


